Complete Bikepacking Food Guide: What to Eat on Multi-Day Adventures
20+ years testing gear in Colorado backcountry
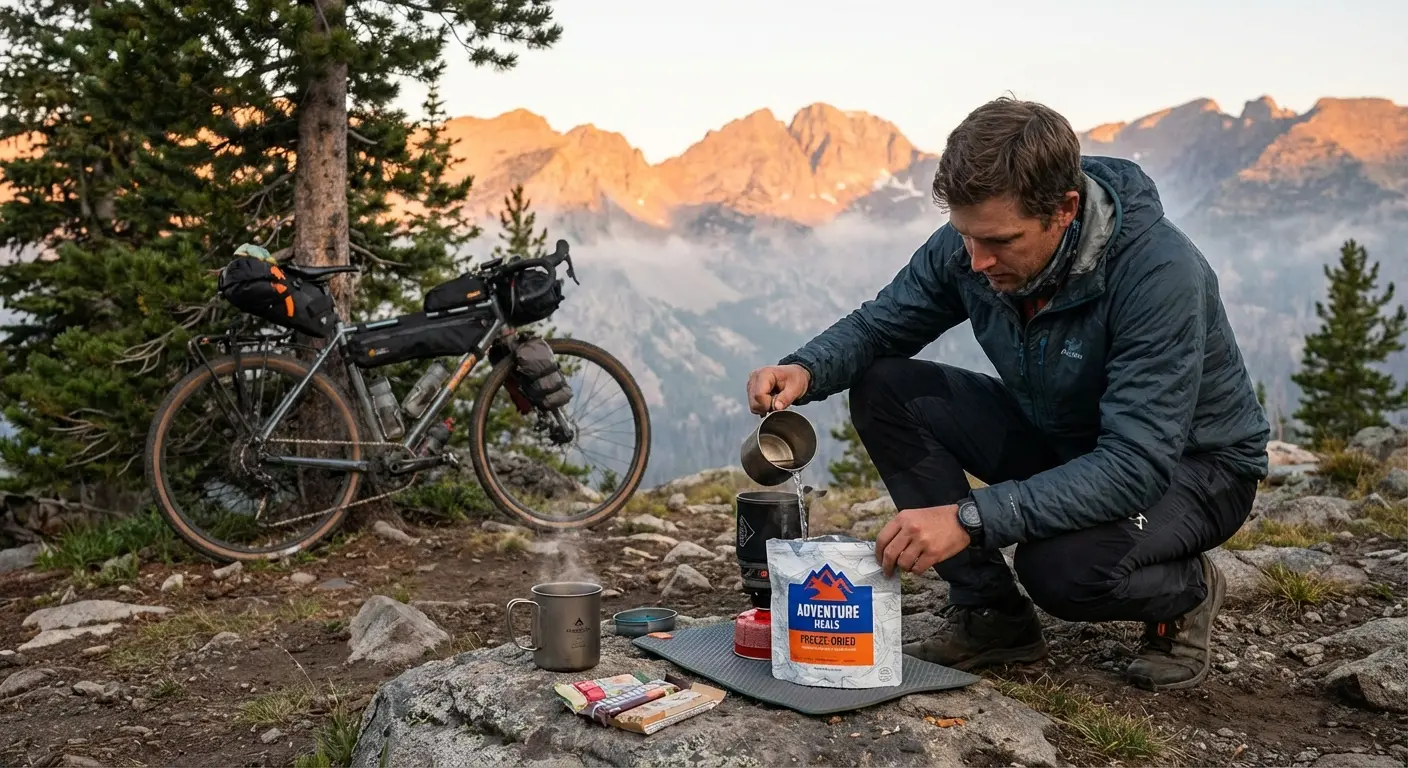
Proper Nutrition Makes or Breaks Your Trip
You can have the perfect bike, the lightest gear, and the most scenic route—but run out of fuel and none of it matters. Bonking 30 miles from camp with no food left isn't just uncomfortable; it can end your trip.
Bikepacking demands more from your body than almost any other outdoor activity. You're burning calories constantly—not just while pedaling, but hauling gear up hills, making camp, and recovering overnight. According to Adventure Cycling Association, most bikepackers should budget at least 3,000-4,000 calories per day, with demanding terrain pushing that higher.
The best bikepacking food isn't just about calories—it's about the right calories at the right time, in packaging that survives bouncing down rough trails.
This guide covers everything you need to know about fueling multi-day bikepacking adventures: how much to eat, what foods work best, meal planning strategies, and practical systems that keep you riding strong from dawn to dusk.
For cooking gear recommendations, see our Bikepacking Stoves Guide and Cookware Guide.
How Many Calories Do You Actually Need?
The short answer: more than you think. Research consistently shows bikepackers underestimate caloric needs by 30-40%.
Daily Calorie Requirements
| Riding Intensity | Daily Calories | Notes |
|---|---|---|
| Light (3-4 hours, flat terrain) | 2,500-3,500 | Weekend touring pace |
| Moderate (5-6 hours, mixed terrain) | 3,500-4,500 | Typical bikepacking |
| Hard (7+ hours, mountainous) | 4,500-6,000+ | Demanding routes |
| Ultra-racing | 8,000-10,000+ | Elite endurance events |
The math behind it: You burn roughly 500-800 calories per hour of cycling, depending on intensity and body weight. Add your basal metabolic rate (1,500-2,000 calories for most adults just existing) plus the energy cost of camp activities, and numbers climb fast.
Real-world example: A 150-pound rider covering 70 miles with 5,000 feet of climbing might burn:
- 7 hours riding × 600 cal/hour = 4,200 calories
- Plus baseline metabolism = ~2,000 calories
- Total: ~6,200 calories for the day
You won't replace all of it—and that's okay. Your body can tap fat reserves to cover some deficit. But chronically under-fueling leads to fatigue, poor recovery, and eventually bonking.
The Caloric Deficit Reality
Three-time Transcontinental Race winner Kristof Allegaert reported consuming only about 3,000 calories daily while burning an estimated 10,000 calories—losing 7 kg over 8.5 days. Elite racers accept this deficit for speed. For recreational bikepackers, that level of deficit means miserable rides and potential health issues.
Practical target: Aim to consume 70-80% of calories burned. You'll lose some weight on multi-day trips regardless, but keeping the deficit manageable preserves performance and enjoyment.
Macronutrients: Carbs, Fat, and Protein
Understanding macronutrients helps you choose foods that actually fuel endurance cycling rather than just filling your stomach.
Carbohydrates: Your Primary Fuel
Carbs are king for cycling performance. During moderate to high-intensity effort, your muscles preferentially burn carbohydrates. Run low on glycogen (stored carbs), and performance tanks—the infamous "bonk."
How much: 50-65% of total calories, or roughly 5-10 grams per kilogram of body weight daily depending on training intensity. For a 70kg (154lb) rider on demanding terrain, that's 350-700 grams of carbs daily.
Hourly intake while riding: Aim for 60-90 grams of carbohydrates per hour during sustained effort. Using multiple carbohydrate types (glucose + fructose) improves absorption—your gut can process more when sources are mixed.
Best bikepacking carb sources:
- Instant oatmeal and granola
- Rice and couscous
- Tortillas and bread
- Dried fruit
- Energy bars
- Sports drinks and gels
Fat: Slow-Burning Energy Reserve
Fat provides more calories per gram (9 cal/g) than carbs or protein (4 cal/g), making it weight-efficient for bikepacking. Your body uses fat as fuel during lower-intensity riding and while sleeping.
How much: 20-35% of total calories. Fat helps you feel satisfied and provides essential fatty acids.
Best bikepacking fat sources:
- Nut butters (peanut, almond)
- Nuts and seeds
- Olive oil (add to meals)
- Cheese (harder varieties travel well)
- Chocolate
- Coconut oil
Protein: Recovery and Repair
Protein rebuilds muscle damaged during hard efforts. While you don't burn much protein as fuel, inadequate intake impairs recovery.
How much: 15-25% of total calories, or 1.2-1.6 grams per kilogram of body weight. For a 70kg rider, that's roughly 85-112 grams daily.
Best bikepacking protein sources:
- Tuna and salmon packets
- Jerky and meat sticks
- Nuts and nut butters
- Cheese
- Protein powder (add to oatmeal)
- Freeze-dried meals with meat
The Practical Ratio
Don't overthink exact percentages while riding. A useful rule of thumb: eat carbs while riding, add fats and protein at camp. Your trail snacks should be carb-focused for immediate energy; your evening meal can include more fat and protein for recovery and satiety.
Food Categories: What to Pack
Breakfast Options
Morning fuel sets up your entire day. You need enough energy to start riding while also being quick to prepare—nobody wants to spend an hour cooking when trails await.
Hot breakfast favorites:
- Instant oatmeal (add nut butter, dried fruit, protein powder)
- Instant rice with coconut cream
- Ramen with peanut butter (trust us)
- Grits with cheese
No-cook options:
- Overnight oats (prep night before)
- Granola with powdered milk
- Tortilla with peanut butter and honey
- Pop-Tarts (ultralight classic)
Calorie target: 500-800 calories to start the day. Many bikepackers eat light at camp and snack heavily in the first hours of riding.
For detailed breakfast strategies, see our Bikepacking Breakfast Ideas guide.
Trail Snacks: Eat Early, Eat Often
Eating while riding is crucial. Waiting until you're hungry means you're already behind on fuel. The bikepacking mantra: eat before you're hungry, drink before you're thirsty.
Ideal trail snack characteristics:
- Easy to eat one-handed (or no hands)
- Won't melt or crush
- High calorie density
- Easy wrapper disposal
- Quick energy (carb-focused)
Top trail snacks:
- Energy bars (Clif, RX, KIND)
- Trail mix (homemade or store-bought)
- Dried fruit (dates, apricots, figs)
- Fig bars and cookies
- Nut butter packets
- Gummy candies
- Pretzels and crackers
- Stroopwafels
Pro tip: Keep snacks accessible. Use a top tube bag, stem bag, or jersey pockets. Food buried in a frame bag doesn't get eaten often enough.
For complete snacking strategy, see Best Trail Snacks for Bikepacking.
Lunch: Riding Through or Stopping?
Most bikepackers don't stop for formal lunch—they graze continuously instead. But when you do want a proper break, simple assembly meals work best.
Quick assembly lunches:
- Tortilla wraps with cheese, meat, or nut butter
- Crackers with tuna or salmon packets
- Pita with hummus (individual packs)
- Bagels with cream cheese packets
- Cheese and summer sausage
Town lunch strategy: Hit a grocery store deli or fast food around midday. Real food tastes incredible after trail provisions, and you can load up on fresh calories before the afternoon push.
Dinner: Recovery Fuel
Dinner is when you rebuild. After a hard day, your body craves substantial food—and finally, you have time to prepare it.
Freeze-dried meals: The easiest option. Boil water, pour it in the bag, wait 10-15 minutes. Quality varies dramatically—see our Best Freeze-Dried Meals for Bikepacking guide.
DIY dehydrated meals: Cheaper than freeze-dried, customize exactly what you want. Requires dehydrator and advance prep.
Simple cooking:
- Ramen upgraded (add peanut butter, jerky, dried veggies)
- Instant rice with tuna packet
- Couscous with olive oil, spices, jerky
- Mac and cheese (Kraft-style, lightweight)
- Instant mashed potatoes with cheese
Calorie target: 800-1,200 calories for dinner, plus any snacking before sleep. This is when fat and protein become more important—they digest slowly, keeping you fueled overnight.
Beverages and Electrolytes
Water alone isn't enough during sustained effort. You're sweating out sodium, potassium, and other minerals that affect muscle function and hydration.
Electrolyte options:
- Drink mixes (Skratch, Nuun, LMNT)
- Electrolyte tablets
- Simple salt packets
- Pickle juice (old-school but effective)
Coffee: Essential for many riders. Options range from instant coffee packets to the AeroPress Go for camp café quality. See our Bikepacking Coffee Guide for details.
For complete hydration strategy, see Bikepacking Hydration: Water Bottles vs Bladders.
Meal Planning by Trip Length
Weekend Trips (2-3 Days)
For short trips, you can carry everything from home. No resupply strategy needed—just pack sufficient food and go.
Typical food weight: 1.5-2 pounds per day Planning approach: Slightly overpack. Better to return with extra than run short.
Sample menu (per day):
- Breakfast: Instant oatmeal with nut butter (400 cal)
- Trail snacks: 4-5 bars/snacks throughout day (800 cal)
- Lunch: Tortilla wraps or crackers with tuna (500 cal)
- Dinner: Freeze-dried meal (600 cal)
- Evening snacks: Chocolate, nuts (300 cal)
- Daily total: ~2,600 calories packed (supplement with more snacking)
Week-Long Adventures (5-7 Days)
Carrying 7 days of food at once is impractical—you're looking at 10-14 pounds of food weight alone. Plan one or two resupply stops.
Planning approach: Pack 3-4 days of food, resupply at towns along the route.
Resupply considerations:
- Gas stations: Limited to candy, chips, jerky, sometimes sandwiches
- Grocery stores: Full selection, can buy fresh produce
- Restaurants: Real food boost, but check hours in small towns
- Mail drops: Ship yourself food to post offices along the route
For resupply strategy, see How to Resupply on Long Bikepacking Routes.
Extended Expeditions (2+ Weeks)
Long trips require treating food as logistics. You'll resupply multiple times, often with limited choices.
Planning approach:
- Map resupply points before departure
- Research what's actually available (that "general store" might only have chips)
- Mail yourself critical supplies to post offices
- Carry emergency food beyond planned needs
- Build flexibility into timing—weather delays happen
Expedition food wisdom:
- Variety prevents menu fatigue
- Familiar favorites provide comfort
- High-quality meals boost morale on hard days
- Town food tastes incredible—budget time for real restaurants
No-Cook vs. Hot Meals
The No-Cook Approach
Some bikepackers skip cooking entirely. No stove weight, no fuel logistics, no time spent cooking.
No-cook staples:
- Tortillas with everything
- Nut butter (lots of it)
- Cheese and crackers
- Tuna/salmon packets
- Jerky and meat sticks
- Trail mix and nuts
- Cold-soaked oats or couscous
- Protein bars
- Whatever town food offers
Best for:
- Ultralight purists
- Warm weather trips
- Routes with frequent town stops
- Riders who don't care much about food
Reality check: Most riders eventually crave hot food. Even no-cook minimalists often appreciate instant coffee and hot ramen after a cold, wet day.
For complete no-cook strategies, see No-Cook Bikepacking Food Ideas.
The Case for Hot Meals
Hot food isn't just comfort—it serves practical purposes:
- Warm weather performance: Cold food sits better in heat; hot food is essential in cold
- Morale boost: A hot meal transforms camp from "survival" to "experience"
- Digestibility: Warm food is easier on your gut than cold food repeatedly
- Calorie density: Cooking enables foods (rice, pasta) that are denser than ready-to-eat options
Minimum hot setup: A 2.6 oz stove, lighter, and 100g fuel canister adds under half a pound. For multi-day trips, that weight enables significantly better eating.
For cooking gear, see our Bikepacking Stoves Guide.
Calorie-Dense Foods: Maximum Energy, Minimum Weight
Weight matters in bikepacking. These foods deliver the most calories per ounce.
| Food | Calories/oz | Notes |
|---|---|---|
| Olive oil | 250 | Add to anything |
| Nut butters | 170-190 | Protein + fat + carbs |
| Chocolate | 150-160 | Morale booster |
| Nuts/seeds | 160-180 | Great snacking |
| Dried coconut | 185 | Add to oatmeal |
| Cheese (hard) | 110-120 | Protein + fat |
| Jerky | 80-100 | Pure protein |
| Dried fruit | 80-90 | Quick sugar |
| Energy bars | 120-140 | Convenient |
| Instant oatmeal | 110 | Breakfast staple |
| Ramen | 130 | Cheap and light |
| Couscous | 100 | 5-minute cook time |
Ultra-calorie hacks:
- Add olive oil to dinner (250 cal per tablespoon)
- Stir nut butter into oatmeal (190 cal per 2 tablespoons)
- Carry full-fat everything
- Choose calorie-dense trail mix (nuts + chocolate + coconut)
For complete calorie optimization, see Calorie-Dense Foods for Bikepacking.
Food Storage and Safety
Keeping Food Fresh
Most bikepacking food doesn't need refrigeration—that's the point. But some items require attention:
Lasts indefinitely:
- Sealed freeze-dried meals
- Packaged bars and snacks
- Dried fruit and nuts (sealed)
- Nut butter (sealed)
Lasts several days:
- Hard cheese (cheddar, gouda)
- Salami/summer sausage
- Jerky (opened)
- Tortillas
Use first day:
- Fresh bread
- Soft cheese
- Fresh fruit
- Deli meat
Bear Country Considerations
In bear habitat, food storage becomes critical. Improper storage risks bear encounters and potential closures for future visitors.
Options:
- Bear canisters: Required in some areas, bulky but effective
- Bear bags: Lighter, require tree-hanging skills
- Ursacks: Bear-resistant stuff sacks, compromise option
Local regulations vary. Research your route's requirements before departure.
For complete food storage guidance, see Bear Canisters vs Bear Bags.
Special Diets
Vegan Bikepacking
Plant-based bikepackers face challenges with convenience store resupply but can thrive with planning.
Vegan-friendly staples:
- Nut butters (most are vegan)
- Nuts and seeds
- Dried fruit
- Oatmeal
- Rice and couscous
- Tortillas
- Hummus packets
- Some freeze-dried meals (check labels)
Challenges:
- Limited protein options
- Town resupply often lacks vegan choices
- Need more planning for balanced nutrition
For complete plant-based strategies, see Vegan Bikepacking Food Guide.
Gluten-Free Bikepacking
Many convenient bikepacking foods contain gluten (bars, bread, pasta). But options exist:
Gluten-free options:
- Rice-based meals
- Corn tortillas
- GF oats (check certification)
- Nut butters
- Fresh fruit and cheese
- Rice crackers
- GF bars (many available)
- Most freeze-dried meals have GF options
Food Allergies
Pack defensively. Read every label. In remote areas, medical help is far away.
Strategies:
- Carry safe backup food beyond normal supplies
- Research town options before counting on them
- Consider carrying allergy medication (consult your doctor)
- Inform riding partners about your allergies
Budget Bikepacking Food
Quality bikepacking food doesn't require expensive freeze-dried meals. The grocery store offers everything you need.
Cost Comparison
| Food Strategy | Cost/Day | Notes |
|---|---|---|
| Freeze-dried meals only | $25-40 | Convenient but expensive |
| Mix freeze-dried + grocery | $15-25 | Balanced approach |
| All grocery store food | $10-15 | Budget-friendly |
| DIY dehydrated + grocery | $8-12 | Lowest cost, most prep |
Budget Shopping List
From any grocery store:
- Instant oatmeal packets (~$0.25 each)
- Ramen (~$0.30 per pack)
- Instant rice (~$0.50 per serving)
- Peanut butter (~$3 per jar)
- Tortillas (~$3 per dozen)
- Cheese blocks (~$4 per 8oz)
- Tuna packets (~$1.50 each)
- Trail mix (~$4 per pound)
- Crackers (~$3 per box)
For complete budget strategies, see Budget Bikepacking Food.
The Food Test Run: Practice Your System
Don't discover problems on day three of a trip. Test your food strategy at home.
The Kitchen Simulation
Before your trip:
- Lay out all food: Does it actually fit in your bags?
- Weigh everything: Is total weight acceptable?
- Calculate calories: Do daily totals hit your targets?
- Test cooking: Practice your stove and meals
The Backyard Overnight
The real test:
- Pack your bike with actual food quantities
- Ride for 2-3 hours to simulate conditions
- Eat your planned trail snacks while riding
- Set up camp and prepare dinner
- Evaluate: Were you hungry? Did food survive? Was cooking reasonable?
What you'll discover:
- Which snacks you actually eat vs. ignore
- Whether your food packaging survives bouncing
- If cooking complexity matches your post-ride energy
- Foods that taste great at home but terrible after 50 miles
Sample Meal Plans
Ultralight Weekend (2 Days)
| Meal | Day 1 | Day 2 |
|---|---|---|
| Breakfast | Pop-Tarts + coffee | Instant oatmeal + nut butter |
| Trail snacks | 4 bars, trail mix, dried fruit | 4 bars, trail mix, fig bars |
| Lunch | Tortilla + peanut butter | Crackers + tuna packet |
| Dinner | Ramen + peanut butter + jerky | Couscous + olive oil + cheese |
Daily calories: ~2,800 Total food weight: ~3.5 lbs
Standard Week (7 Days, 1 Resupply)
Days 1-4 (carry from start):
- Breakfasts: 2 instant oatmeal, 2 granola + powdered milk
- Dinners: 2 freeze-dried, 2 ramen-based
- Snacks: Mix of bars, trail mix, dried fruit
- Resupply Day 4 afternoon
Days 5-7 (resupply stock):
- Town breakfast Day 5
- Dinners: Fresh groceries + 1 freeze-dried
- Snacks: Resupply bars and fresh fruit
For complete meal planning guidance, see Bikepacking Meal Planning.
Common Nutrition Mistakes
Mistake 1: Not Eating Early Enough
The problem: Waiting until hunger strikes means glycogen is already depleted.
The fix: Start eating within 30 minutes of starting. Snack every 30-45 minutes thereafter.
Mistake 2: Same Food Every Day
The problem: "Menu fatigue" makes you eat less, leading to caloric deficit.
The fix: Build variety into your menu. Different bar flavors, rotating dinners, town food breaks.
Mistake 3: Forgetting Electrolytes
The problem: Water alone doesn't replace what you sweat out.
The fix: Use electrolyte drink mix, especially in heat. Don't wait until you cramp.
For electrolyte strategy, see Electrolytes and Sports Nutrition for Bikepacking.
Mistake 4: Overpacking Freeze-Dried Meals
The problem: Expensive, heavy, and often lower-calorie than alternatives.
The fix: Use freeze-dried strategically—one per day maximum. Fill gaps with lighter, cheaper foods.
Mistake 5: Ignoring Real Food Opportunities
The problem: Passing through towns without eating "real" food.
The fix: Budget time for restaurant meals. Fresh food boosts morale and nutrition variety.
FAQ
How much food should I carry per day?
Plan for 1.5-2 pounds of food per day, depending on food choices and your caloric needs. Calorie-dense foods (nuts, nut butter, olive oil) reduce weight while maintaining energy.
What's the best bikepacking food for hot weather?
In heat, favor salty snacks (pretzels, crackers), electrolyte drinks, and foods that won't melt (avoid chocolate, choose nut butter packets). Cold-soaked meals become more appealing.
Can I survive on energy bars alone?
Technically yes, but you'll hate it. Bar fatigue is real. Use bars as trail fuel and eat real food at camp for variety and complete nutrition.
How do I keep food cool without a cooler?
You don't—choose foods that don't require refrigeration. Hard cheese, salami, and sealed packages last days without cooling. Fresh food should be eaten first.
What's the lightest breakfast option?
Pop-Tarts or similar pastries offer the best calories-per-ounce with zero prep. For hot breakfast, instant oatmeal plus nut butter provides excellent nutrition with minimal weight.
Should I count calories while bikepacking?
Not obsessively. Know approximately how much you're eating and trust your hunger signals. If you're losing significant weight or energy, eat more. Most riders under-eat rather than over-eat.
Quick Reference: Food by Purpose
| Purpose | Best Foods |
|---|---|
| Quick energy | Energy gels, dried fruit, gummy candies |
| Sustained energy | Bars, nuts, nut butter, cheese |
| Recovery | Protein bars, jerky, freeze-dried meals with protein |
| Hydration support | Electrolyte drinks, salty snacks |
| Morale boost | Chocolate, cookies, town restaurant food |
| Weight efficiency | Olive oil, nuts, nut butter, hard cheese |
For cooking gear to prepare your food, see our Bikepacking Stoves Guide and Cookware Guide. Keep your provisions protected with our Waterproof Bags Guide.
Eat well. Ride far. Fuel the adventure.


