Bikepacking Hydration: Water Bottles vs Bladders
20+ years testing gear in Colorado backcountry
This article contains affiliate links. We may earn a commission if you make a purchase through our links, at no extra cost to you.
Water Is Your Most Critical Supply
You can ride hungry. You can't ride dehydrated. In hot conditions, severe dehydration becomes dangerous within hours. Even mild dehydration tanks performance—by the time you feel thirsty, you've already lost 1-2% body weight in water and performance has dropped measurably.
Bikepacking adds complexity: you need enough water to reach the next source, but water is heavy—2.2 pounds per liter. Carry too little and you risk dehydration; carry too much and you're hauling unnecessary weight up every climb.
This guide covers the two main hydration systems—bottles and bladders—and helps you build a strategy that keeps you safely hydrated without overloading your bike.
For complete nutrition planning, see our Complete Bikepacking Food Guide. For water treatment options, check our Water Filtration Systems Guide.
Water Bottles vs. Hydration Bladders
The eternal debate. Both systems work; each has distinct advantages.
Water Bottles
Traditional cycling bottles in frame cages.
Pros:
- Easy to see water level
- Simple to fill and clean
- No failure points (bladders can leak)
- Can use multiple bottles for organization (water, electrolytes)
- Cheaper and more durable
- Easy to add/remove capacity
Cons:
- Requires hand off bars to drink
- Limited cage mounting points on some bikes
- Bottles can eject on rough terrain
- Less capacity per mounting point
Hydration Bladders
Reservoir in pack or frame bag with drinking tube.
Pros:
- Drink without hands off bars
- Large capacity in one container (2-3L)
- Encourages more frequent drinking
- Tube accessible while riding
Cons:
- Can't see remaining water
- Harder to clean (mold risk)
- Tube/bite valve can fail
- Heavier system overall
- More expensive
- Harder to fill
Featured Products
CamelBak Podium Chill
The Podium Chill has become the default cycling water bottle for good reason. The self-sealing Jet Valve delivers water without squeezing—just bite and drink. Double-wall insulation keeps water noticeably cooler than standard bottles in summer heat. The 21oz (620ml) size fits standard cages while maximizing capacity. The wide mouth fills easily and accepts ice cubes. Dishwasher safe for easy cleaning. The lock-out switch prevents leaks in bags. At around $15, it's affordable enough to run multiples. For bottle-based hydration, this is the standard.
- Self-sealing Jet Valve
- Double-wall insulation
- 21oz capacity
- Lock-out leak prevention
- Dishwasher safe
Osprey Hydraulics LT 2.5L Reservoir
If you prefer bladders, Osprey's Hydraulics LT delivers premium quality at reasonable weight. The 2.5L capacity handles most bikepacking needs without the bulk of 3L models. The slider opening makes filling and cleaning far easier than traditional bladders—you can actually get your hand inside. The magnetic sternum clip keeps the tube accessible. Taste-free material and antimicrobial treatment reduce that plastic flavor. The reversible design allows thorough drying to prevent mold. Works with most frame bags and hydration-compatible bikepacking packs. Osprey's warranty adds confidence.
- 2.5L capacity
- Slider opening for easy cleaning
- Magnetic tube clip
- Reversible for drying
- Antimicrobial treatment
Fidlock Twist Bottle Set
Fidlock revolutionizes bottle mounting with magnetic attachment. The bottle snaps magnetically into the base—no fumbling with tight cages. One-handed removal and replacement while riding. The secure lock won't eject on rough terrain (a common cage problem). The system opens mounting options—Fidlock bases can attach to frame tubes, stems, or anywhere with flat surface. The 600ml bottle works perfectly for most uses. Downsides: the system is expensive, and you're locked into Fidlock bottles for that base. But for bikepacking on rough terrain where bottles eject from standard cages, Fidlock solves a real problem.
- Magnetic one-handed attachment
- Secure against ejection
- Flexible mounting options
- Easy removal while riding
- 600ml capacity
Salsa Anything Cage HD
Standard bottle cages only hold standard bottles. The Salsa Anything Cage HD holds anything: oversized bottles, Nalgenes, soft flasks, even small dry bags. The adjustable straps accommodate 2.5-inch to 4-inch diameter items. Mount on fork blades, frame tubes, or anywhere with bottle bosses. Aluminum construction handles bikepacking abuse. This versatility transforms your carrying options—run a Nalgene for more capacity, or use for non-water storage when water needs are met. Heavier than standard cages (150g) but vastly more useful.
- Holds 2.5-4 inch diameter items
- Works with Nalgenes, soft flasks
- Aluminum construction
- Adjustable strap system
- Fork or frame mounting
HydraPak Stash 1L
Soft flasks solve bikepacking's space problem: when empty, they compress to nothing. The HydraPak Stash collapses to pocket-size when empty, then expands to hold 1L. Use as supplemental capacity on long dry stretches, then pack away when near water. The wide mouth fills easily from streams. The twist cap seals reliably. Store in jersey pocket, frame bag, or anything cage. BPA-free and taste-free. The 1L size is practical; larger soft flasks become unwieldy. Carry one or two for flexible capacity without permanent bulk.
- Collapses when empty
- 1L capacity expanded
- Fits in jersey pocket
- Wide mouth for filling
- BPA and taste free
Comparison Table
| Factor | Bottles | Bladders |
|---|---|---|
| Typical capacity | 20-24oz each | 2-3L (70-100oz) |
| Weight efficiency | Better (less system weight) | Worse (reservoir + tube) |
| Ease of drinking | Requires hand off bars | Hands-free via tube |
| Water visibility | Excellent | Poor |
| Cleaning | Easy (dishwasher safe) | Difficult (mold risk) |
| Durability | High (little to fail) | Moderate (tube/valve issues) |
| Flexibility | High (add/remove bottles) | Low (fixed capacity) |
| Cost | $10-20 per bottle | $30-50 for reservoir |
How Much Water to Carry
Factors Affecting Water Needs
Temperature: Hot conditions demand 1L+ per hour during hard effort. Intensity: Harder riding = more sweating = more water needed. Humidity: Dry air increases water loss through breathing. Altitude: Higher elevation = drier air = more water loss. Individual variation: Some people simply sweat more.
General Guidelines
| Conditions | Hourly Need | For 3-Hour Stretch |
|---|---|---|
| Cool, moderate effort | 0.5-0.75L | 1.5-2.25L |
| Warm, moderate effort | 0.75-1L | 2.25-3L |
| Hot, hard effort | 1-1.5L | 3-4.5L |
| Desert/extreme | 1.5-2L | 4.5-6L |
The Capacity Question
How much capacity do you need?
Calculate based on:
- Longest expected stretch between water sources
- Your hourly consumption rate
- Safety margin (+20-30%)
Example:
- 4-hour stretch to next water
- Warm conditions: 1L/hour
- Need: 4L base + 1L margin = 5L capacity
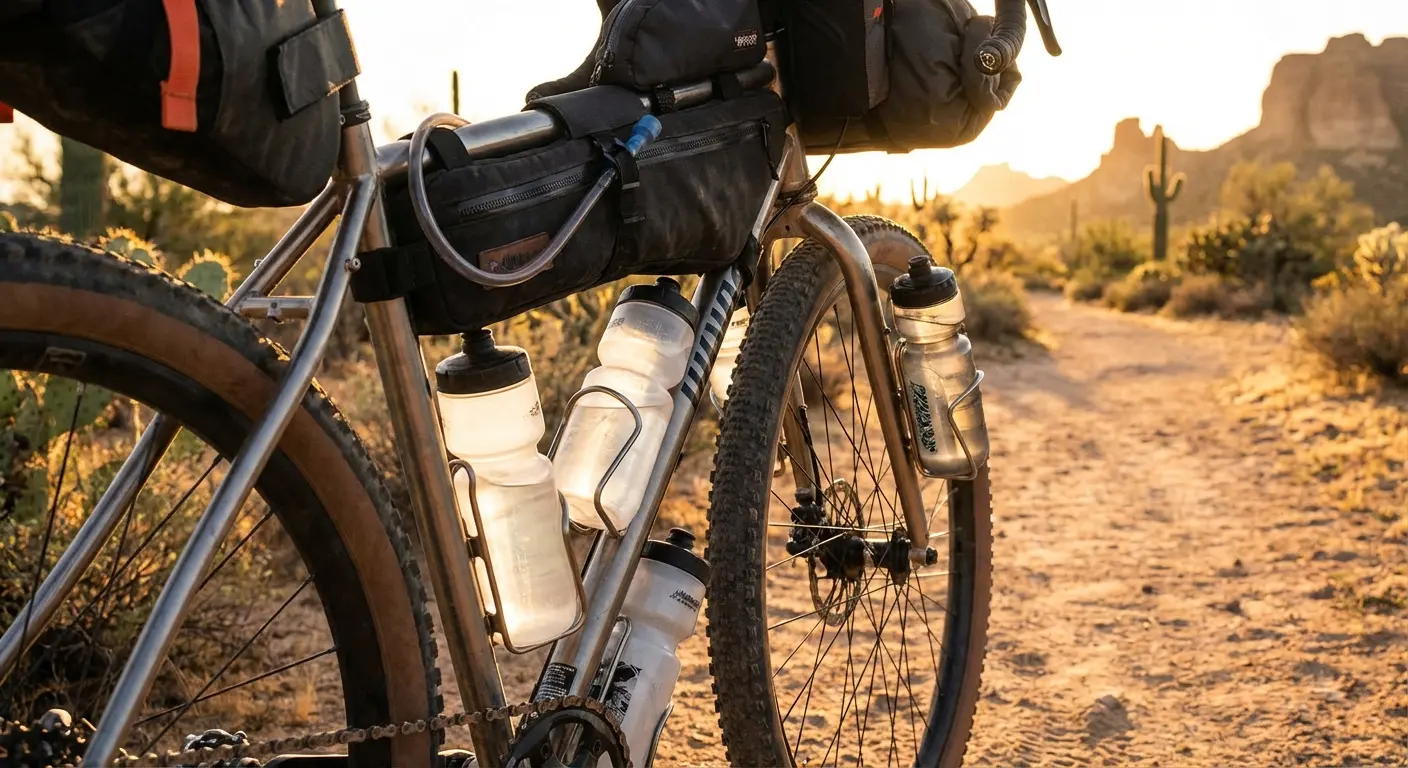
Mounting Points vs. Capacity
Standard bikepacking setup:
- 2 frame bottles: ~1.2L
- 2 fork bottles: ~1.2L
- Total: ~2.4L
For longer dry stretches, add:
- Larger bottles (24oz+)
- Soft flasks in pockets/bags
- Bladder in frame bag
- Anything cages for Nalgenes
Building Your Hydration System
Minimalist Setup (Frequent Water)
For routes with water sources every 1-2 hours:
- 2 standard bottles (1.2L total)
- Refill frequently
Best for: Populated routes, areas with streams, casual trips.
Standard Setup (Moderate Gaps)
For 2-4 hour stretches between water:
- 2 frame bottles + 2 fork bottles (2.4L)
- Or 2 bottles + 1.5-2L bladder (2.7-3.2L)
Best for: Most bikepacking, moderate terrain.
High-Capacity Setup (Dry Stretches)
For 4+ hour gaps or desert conditions:
- 4 standard bottles (2.4L)
- Plus 2L bladder (4.4L)
- Plus collapsible soft flasks (5-6L total)
Best for: Desert routes, remote wilderness, hot conditions.
The Hybrid Approach
Many bikepackers combine systems:
- Bottles for electrolyte drinks and quick access
- Bladder for plain water volume
- Soft flasks as emergency backup
This provides:
- Visibility (bottles show levels)
- Convenience (bladder for sipping)
- Flexibility (soft flasks expand/collapse)
Electrolytes: Beyond Plain Water
Water alone isn't enough during sustained effort.
Why Electrolytes Matter
You sweat out sodium, potassium, magnesium, and other minerals. Plain water dilutes remaining electrolytes further. Result: cramping, fatigue, and impaired performance.
Signs of Electrolyte Imbalance
- Muscle cramps
- Headache
- Fatigue beyond normal
- Dizziness
- Nausea
Electrolyte Strategies
Drink mixes:
- Skratch Labs, Nuun, LMNT, Liquid IV
- Add to one bottle; keep other as plain water
- Vary by intensity and temperature
Tablets:
- Nuun tablets dissolve in any bottle
- Convenient, lightweight
- Less control over concentration
Salt/food:
- Salty snacks (pretzels, chips)
- Salt packets from fast food
- High-sodium foods at resupply
Frequency:
- Moderate conditions: Electrolytes every other bottle
- Hot/hard conditions: Every bottle or alternate with plain
- Listen to your body—cramps mean more electrolytes
For more on nutrition, see Electrolytes and Sports Nutrition for Bikepacking.
Practical Tips
Tip 1: Know Before You Go
Map water sources before departure:
- Streams, lakes, and rivers (requires filtration)
- Towns with stores or restaurants
- Public parks with spigots
- Gas stations and businesses
Tip 2: Pre-Hydrate
Start riding hydrated. Drink 500ml-1L in the hour before departure. You can't catch up once behind.
Tip 3: Drink Before Thirsty
Thirst lags dehydration. Sip consistently rather than waiting until desperate.
Bladder advantage: Convenient tube encourages frequent drinking. Bottle tip: Set timer reminders to drink.
Tip 4: Manage Water Weight
Water is heavy (2.2 lbs/L). Strategies:
- Top off near sources (full bottles at bottom of climb waste energy)
- Drink heavily when near refill (why carry it?)
- Calculate actual needs vs. comfort margin
Tip 5: Clean Bladders Thoroughly
Bladder mold is real. After every trip:
- Rinse with hot water
- Dry completely (hang inverted, prop open)
- Consider drying tablets (Camelbak cleaning tabs)
- Store with opening unsealed
Water Sources and Treatment
Source Reliability
| Source | Reliability | Treatment Needed |
|---|---|---|
| Town tap water | High | Usually none (US/Canada) |
| Gas station | High | None |
| Stream/river | Variable | Always filter/treat |
| Lake | Variable | Filter + treat (more risk) |
| Spring | Usually good | Filter to be safe |
| Snow melt | Seasonal | Filter |
Quick Treatment Options
Filtration:
- Sawyer Squeeze: 3oz, filters 100,000+ gallons
- Katadyn BeFree: Fast flow, easy use
- See our Water Filtration Guide
Chemical:
- Aquatabs or Micropur: Lightweight backup
- 30-minute wait time
- Doesn't remove sediment
UV:
- SteriPen: Fast, effective
- Requires batteries
- Doesn't work in cloudy water
Filtration Strategy
Carry at least one filtration method. Chemical backup adds negligible weight. Never risk drinking unfiltered backcountry water—giardia ruins trips.
Mounting and Packing
Standard Bottle Positions
Frame triangle:
- Most bikes have 2 sets of bottle bosses
- Largest capacity position
- Easiest access
Fork blades:
- Adds 2 more bottles (most bikepacking forks)
- Lower center of gravity
- Harder to reach while riding
Under downtube:
- Some bikes have third cage position
- Exposed to road spray
- Good for less-accessed storage
Non-Standard Mounting
Stem mount: Short reach, limited capacity Anywhere cages: Strap to frame tubes Frame bag external: Some have bottle pockets Handlebar harness: Some hold bottles alongside dry bag
Bladder Placement
Frame bag: Most common—gravity helps drainage Hip pack: Easy access, adds weight to body Handlebar bag: Uncommon but works
Common Mistakes
Mistake 1: Underestimating Desert/Heat Needs
"I'll be fine with 2 liters" in 100°F heat = dangerous.
Fix: Research conditions. Err on the side of more capacity in hot/dry environments.
Mistake 2: Forgetting Electrolytes
Drinking tons of plain water while sweating hard = electrolyte depletion.
Fix: Use electrolyte mix, especially in heat. Eat salty snacks.
Mistake 3: Waiting Until Thirsty
Thirst indicates existing dehydration.
Fix: Drink on schedule. Set reminders if needed.
Mistake 4: Ignoring Bladder Maintenance
That funky taste? Mold growing inside.
Fix: Clean and fully dry bladders after every trip.
Mistake 5: Not Testing the System
New bottle cages eject on rough terrain. New bladders leak.
Fix: Test your complete hydration setup on local rides before committing to a long trip.
FAQ
Bottles or bladder—which is better?
Neither is universally better. Bottles offer simplicity and visibility. Bladders offer hands-free drinking and large capacity. Many riders combine both.
How much water should I carry?
Enough to reach the next source plus 20-30% margin. In hot conditions, plan for 1L per hour of riding.
Do I really need electrolytes?
For rides over 2 hours in warm conditions, yes. Plain water doesn't replace what you sweat out.
How do I prevent bladder mold?
Rinse with hot water after use. Dry completely before storing—prop the bladder open or hang inverted. Use cleaning tablets periodically.
Can I use regular water bottles instead of cycling bottles?
Yes, but cycling bottles are designed for on-bike use. Valve systems prevent spills; insulation keeps water cooler. Worth the upgrade.
What's the best water capacity for bikepacking?
Most riders find 2-3L sufficient for typical conditions with moderate resupply. Desert or remote routes may require 4-6L capacity.
Quick Reference: Hydration Checklist
Before the ride:
- Map water sources along route
- Calculate capacity needed for longest stretch
- Pre-hydrate (500ml-1L before departure)
- Prepare electrolyte mix
While riding:
- Drink before thirsty (every 15-20 minutes)
- Alternate water and electrolyte drinks
- Refill at every opportunity in dry conditions
- Monitor urine color (dark = dehydrated)
For multi-day trips:
- Carry filtration method
- Know treatment time if using chemicals
- Plan resupply around water availability
For complete nutrition guidance, see our Complete Bikepacking Food Guide. For water treatment options, check Water Filtration Systems for Bikepacking.
Stay hydrated. Ride strong. Know your water sources.


