Bikepacking Stoves and Cooking Systems: Complete Guide
20+ years testing gear in Colorado backcountry
Hot Meals Change Everything
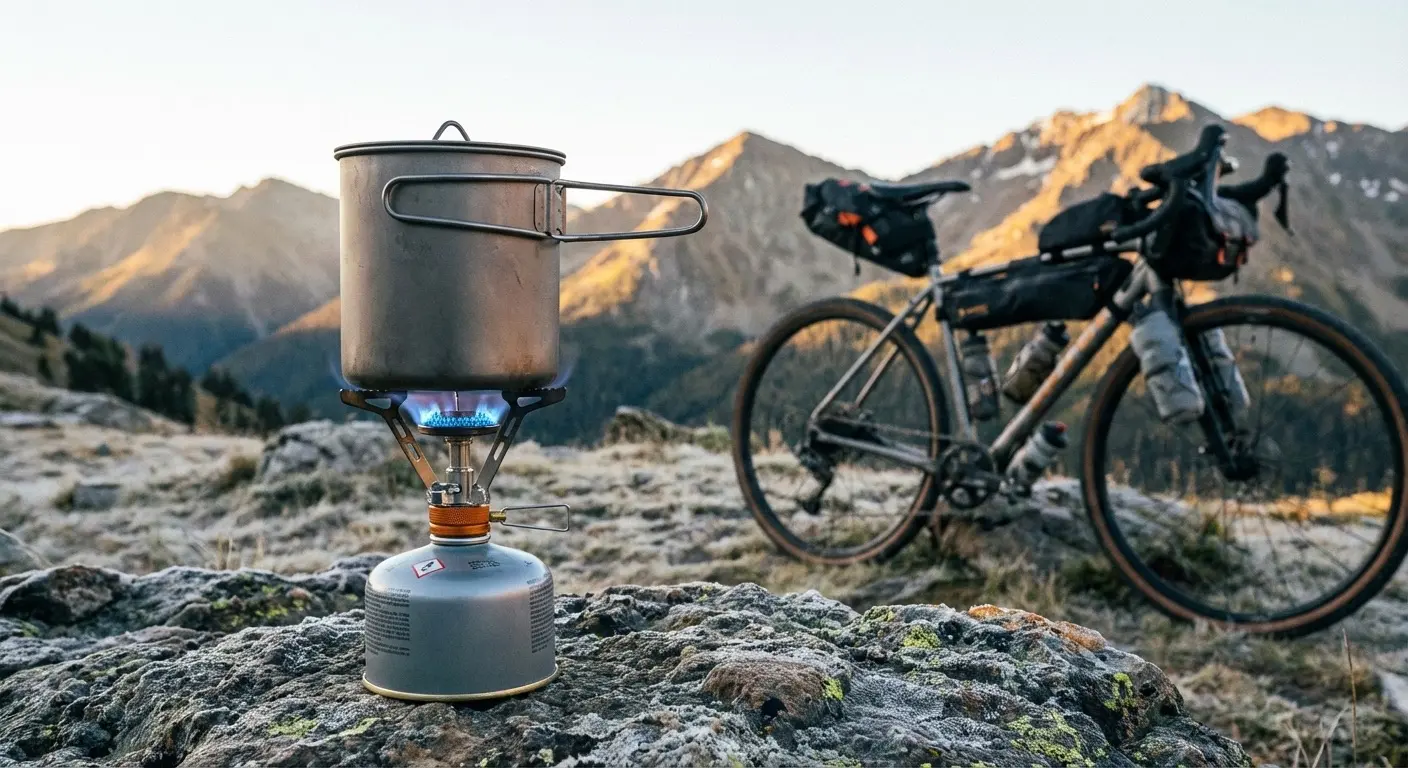
There's nothing like hot coffee on a cold morning or a warm meal after a hard day in the saddle. While some bikepackers go no-cook to save weight, most find that hot food transforms the trip experience. As Outdoor Gear Lab's stove reviews confirm, the right cooking system balances weight, reliability, and fuel efficiency for bike travel. For trail coffee brewing specifically, see our Bikepacking Coffee Guide.
The challenge: bikepacking stoves need to balance weight, packed size, fuel efficiency, and reliability. You're not car camping—every ounce matters, and so does every cubic inch of bag space.
This guide covers the main stove categories, helps you choose the right system for your riding style, and recommends the best options at every price point.
For complete camp gear guidance, see our Bikepacking Camp Gear Guide. For what to cook, check our Complete Bikepacking Food Guide.
Stove Categories Explained
Canister Stoves
Canister stoves burn isobutane-propane fuel from pressurized canisters. They're the most popular choice for bikepackers because they offer excellent performance with minimal weight and complexity.
Advantages:
- Light instantly with no priming
- Excellent simmer control
- Very lightweight (many under 3 oz)
- Minimal maintenance required
- Consistent performance
Disadvantages:
- Fuel canisters can be hard to find in remote areas
- Performance drops in extreme cold
- Canisters aren't refillable (waste concerns)
- Can't fly with fuel
Best for: Most bikepackers—the default choice for good reason.
Integrated Canister Systems
Integrated systems combine stove, pot, and sometimes heat exchanger into one unit. The Jetboil MiniMo exemplifies the category—everything nests together, and the system is optimized to work as one.
Advantages:
- Fastest boiling times
- Most fuel-efficient
- All-in-one convenience
- Excellent wind resistance
Disadvantages:
- Heavier than stove + pot separately
- Less versatile (locked into system)
- More expensive
- Pot size is fixed
Best for: Bikepackers who prioritize convenience and fast boiling over minimum weight.
Alcohol Stoves
Alcohol stoves burn denatured alcohol or HEET (yellow bottle). They're ultralight, simple, and use fuel available at hardware stores worldwide.
Advantages:
- Ultralight (some under 1 oz)
- No moving parts to fail
- Fuel available globally
- Silent operation
- Very affordable
Disadvantages:
- Slower boiling times
- No simmer control (most designs)
- Poor wind resistance
- Less fuel-efficient than canister
Best for: Ultralight purists, international travel, those who value simplicity.
Wood-Burning Stoves
Wood stoves like the Solo Stove Lite burn twigs and small sticks—no fuel to carry. They work brilliantly in forested areas with dry conditions.
Advantages:
- No fuel weight to carry
- Unlimited fuel where wood is available
- Fun "campfire" experience
- Works indefinitely
Disadvantages:
- Useless above treeline or in wet conditions
- Slower than canister stoves
- Leaves pots blackened
- Fire restrictions may apply
Best for: Forested routes, long expeditions, those who enjoy fire-building.
The Kitchen Rehearsal: Practice Before You're Hungry
Don't learn your stove's quirks when you're exhausted and starving. Run this test at home:
The Complete Meal Simulation (30 minutes):
- Set up outside in wind if possible—this reveals real-world performance
- Time your boil: Start timer when flame ignites, stop when rolling boil begins
- Note fuel consumption: Weigh canister before and after (or measure alcohol)
- Test simmer control: Can you actually cook, or just boil?
- Practice ignition: Can you light it in wind? With cold hands?
What Most People Discover:
- Boil time reality: Often 30-50% longer than manufacturer claims (especially in wind)
- Fuel math: A 100g canister might only provide 4-5 boils, not the 8-10 you expected
- Stability concerns: Some stoves wobble with full pots—discover this before it spills on your sleeping bag
- Simmer limitations: Many ultralight stoves have only two settings: "off" and "full blast"
The Wind Test (Essential): Your first time cooking in significant wind will be frustrating if you haven't practiced. Set up on a breezy day and observe:
- How much does wind affect boil time?
- Does your pot stay stable?
- Do you need a windscreen?
- Can you even keep the flame lit?
The Soto Windmaster exists because this test reveals how badly most stoves perform in wind.
Featured Products
MSR PocketRocket 2
The PocketRocket 2 has been the gold standard for ultralight canister stoves since its release. At just 2.6 ounces, it packs smaller than a deck of cards while delivering enough power to boil a liter of water in about 3.5 minutes. The dual-hinged folding pot supports provide stability, and the classic design has proven reliable across thousands of miles of bikepacking routes. It lacks a piezo igniter (carry a lighter), but that's a deliberate choice to save weight and complexity. For most bikepackers wanting maximum capability with minimum weight, this is the stove.
- 2.6 oz ultralight weight
- Boils 1L in ~3.5 minutes
- Compact folding design
- Proven reliability
- Excellent simmer control
Soto Windmaster
The Windmaster earns its name. The recessed burner head creates a protected combustion chamber that maintains efficiency in conditions that defeat conventional stoves. The integrated micro-regulator maintains consistent output as canisters empty and temperatures drop. At 2.3 ounces (stove only), it matches the PocketRocket on weight while adding meaningful wind resistance. The included 4Flex pot support provides stable platform for larger pots. For exposed routes where wind is common, the Windmaster's advantage becomes significant.
- 2.3 oz ultralight weight
- Superior wind resistance
- Micro-regulator for consistent output
- Works in cold temperatures
- 4Flex pot support included
Jetboil MiniMo
When you want maximum convenience and don't mind the extra weight, the MiniMo delivers. The integrated pot and stove nest together for easy packing, and the system boils water in just over two minutes—fastest in class. Unlike the taller Flash, the MiniMo's wider pot makes actual cooking (not just boiling) practical. Excellent simmer control and a built-in heat indicator add convenience. The trade-off: at 14.6 oz total, it weighs significantly more than stove + pot separately. For bikepackers who prioritize hot meals quickly without fuss, the investment pays off.
- Boils water in ~2 minutes
- Integrated pot and stove
- Excellent simmer control
- Efficient fuel consumption
- Built-in heat indicator
Solo Stove Lite
The Solo Stove Lite's double-wall design creates a gasification effect—wood burns more completely with less smoke than traditional fires. At 9 ounces and 4.25 inches diameter, it's surprisingly packable for a wood stove. In forested areas with available fuel, you can cook indefinitely without carrying fuel weight. Boil times run 8-10 minutes for 32 oz of water—slower than canister stoves but faster than you'd expect from burning twigs. The stainless steel construction handles abuse, and the lack of moving parts means nothing to break. For bikepacking through forests where wood is plentiful, it's a capable choice.
- 9 oz weight
- No fuel to carry
- Double-wall gasification design
- Works with twigs and sticks
- Stainless steel durability
Cookware Essentials
For an in-depth look at pots, pans, and utensils, see our dedicated Bikepacking Cookware Guide.
Pots for Bikepacking
A single pot handles most bikepacking cooking needs. Choose based on your meal style:
500-750ml: Sufficient for boiling water for one person. Fits a fuel canister inside for packing. The TOAKS 750ml Titanium Pot represents the category—light, durable, and sized right.
900-1000ml: More room for actual cooking beyond boiling. Better for rehydrating larger meals or making soup.
Titanium vs. Aluminum: Titanium costs more but weighs less and lasts longer. Aluminum conducts heat better (less scorching) and costs less. For bikepacking's weight constraints, titanium usually wins.
Utensils
Spork or long spoon: One eating utensil is enough. Long-handled versions reach pot bottoms easily.
Mug: Optional if your pot doubles as your cup. Dedicated mugs add weight but improve the experience.
What Most Bikepackers Skip
- Plates and bowls (eat from the pot)
- Full utensil sets (one spork handles everything)
- Specialized cookware (keep it simple)
Fuel Considerations
Canister Fuel
Isobutane-propane canisters are sold at outdoor stores in 100g, 230g, and 450g sizes.
Fuel consumption guidelines:
- 100g canister: 3-5 days of boiling water twice daily
- 230g canister: 7-10 days of typical use
Availability: Easy to find in towns with outdoor stores. Harder in remote areas. Plan fuel resupply carefully on long routes.
Cold weather: Canister performance drops below freezing. Keep canisters warm (sleep with them) and choose stoves with pressure regulators (like the Soto Windmaster) for cold conditions.
Alcohol Fuel
Denatured alcohol and HEET are available at hardware stores and auto parts stores worldwide. Carry fuel in small plastic bottles—measure what you need per meal to dial in quantities.
Wood Fuel
Free and unlimited where available. Useless above treeline, in deserts, or during wet conditions. Always check fire restrictions before using wood stoves.
The No-Cook Alternative
Some bikepackers skip stoves entirely. Cold-soaking and no-cook meals eliminate weight and complexity.
What no-cook bikepackers eat:
- Tortillas with nut butter, cheese, or deli meat
- Energy bars and nuts
- Cold-soaked oatmeal or couscous
- Tuna and chicken packets
- Trail mix and dried fruit
- Town food from convenience stores
Best for: Ultralight purists, warm-weather riding, routes with frequent resupply.
Reality check: Most riders doing multi-day trips eventually want hot food. Consider carrying a minimal stove even if you plan to cook rarely—the weight penalty is small, and the option is valuable.
Building Your Cook Kit
Ultralight Setup (~5 oz stove + pot)
| Item | Example | Weight |
|---|---|---|
| Stove | MSR PocketRocket 2 | 2.6 oz |
| Pot | TOAKS 550ml Titanium | 2.5 oz |
| Utensil | Titanium spork | 0.5 oz |
| Lighter | Mini Bic | 0.4 oz |
Total: ~6 oz plus fuel
Standard Setup (~14 oz system)
| Item | Example | Weight |
|---|---|---|
| System | Jetboil MiniMo | 14.6 oz |
| Utensil | Long spoon | 0.5 oz |
Total: ~15 oz plus fuel
No-Fuel Setup (~9 oz)
| Item | Example | Weight |
|---|---|---|
| Stove | Solo Stove Lite | 9 oz |
| Pot | Titanium 750ml | 3.5 oz |
Total: ~12.5 oz with no ongoing fuel weight
FAQ
What's the lightest bikepacking stove option?
Alcohol stoves can weigh under 1 oz. Among canister stoves, the MSR PocketRocket 2 (2.6 oz) and Soto Windmaster (2.3 oz) lead the category.
Canister or alcohol stove?
Canister for most bikepackers—faster, more efficient, and more versatile. Alcohol for ultralight purists, international travel, or those who prioritize simplicity over performance.
How much fuel should I carry?
For canister stoves: 100g per 3-5 days of typical use (boiling water twice daily). Adjust based on your cooking habits and resupply opportunities.
What about wind?
The Soto Windmaster handles wind best among canister stoves. For other stoves, carry a lightweight foil windscreen or cook in sheltered spots.
Quick Recommendations
Best overall: MSR PocketRocket 2—proven reliability, ultralight weight.
Best for wind: Soto Windmaster—wind resistance that actually works.
Best integrated system: Jetboil MiniMo—fastest boiling, maximum convenience.
Best wood burner: Solo Stove Lite—no fuel to carry in forested areas.
For complete camp gear recommendations, see our Bikepacking Camp Gear Guide. Plan your meals with our Complete Bikepacking Food Guide. Match your cooking setup with the right sleep system using our Best Sleeping Bags guide.
Cook well. Rest well. Ride on.


