Complete Bikepacking Comfort Guide: End Pain and Ride Longer
20+ years testing gear in Colorado backcountry
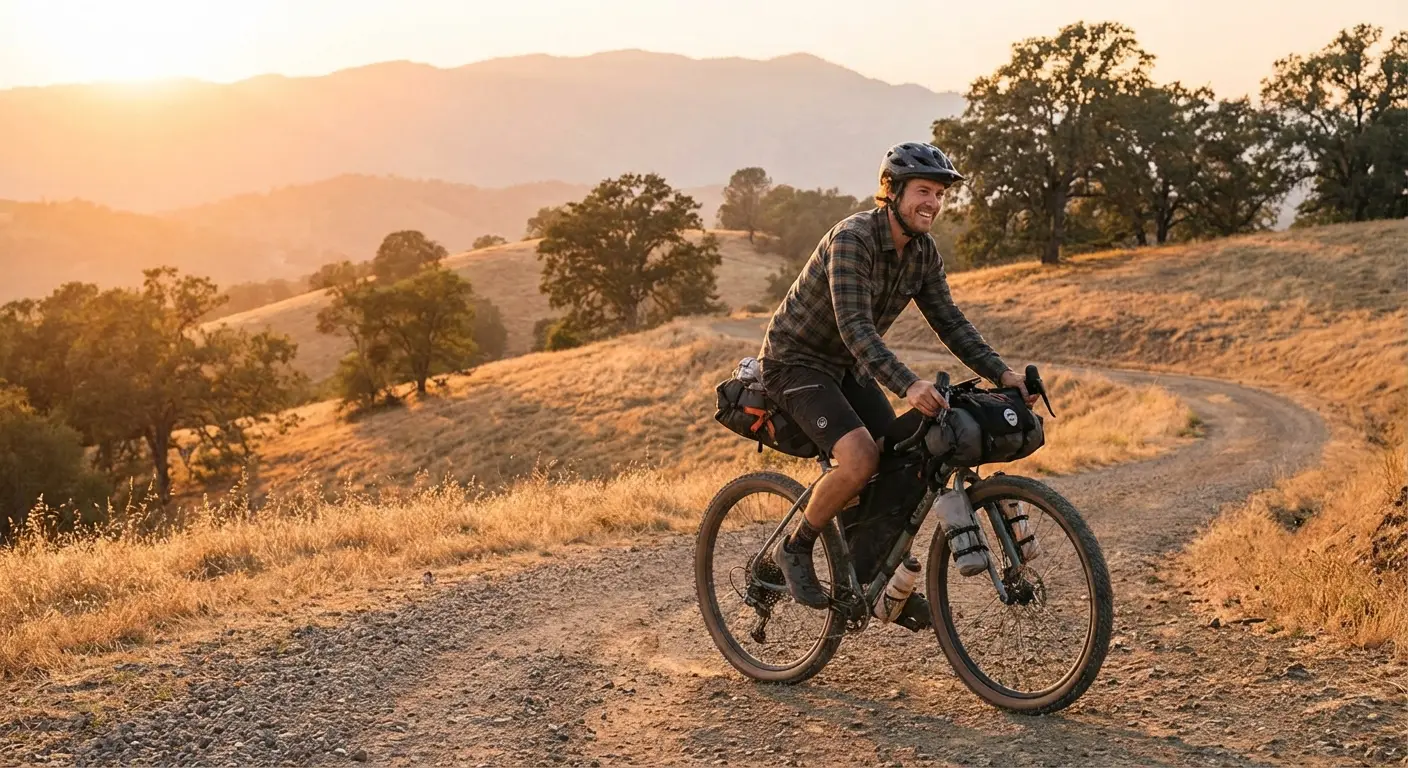
The Comfort Crisis
Physical discomfort ends more bikepacking trips than mechanical failures, bad weather, or running out of food. The difference between suffering through every mile and actually enjoying the journey often comes down to a few adjustments and the right knowledge.
Here's a truth most bikepacking guides won't tell you: the majority of riders experience significant discomfort on multi-day trips. Saddle sores, numb hands, aching knees, stiff necks—these aren't signs of weakness or poor fitness. They're predictable problems with preventable causes.
After years of bikepacking and talking with hundreds of riders, the pattern is clear. Most comfort issues stem from three sources: improper bike fit, inadequate preparation, and ignoring early warning signs. Fix these, and you'll transform your riding experience.
This guide covers the full spectrum of bikepacking comfort—from preventing problems before they start to dealing with issues on trail. Whether you're planning your first overnight or your twentieth expedition, understanding comfort fundamentals will help you ride farther with less suffering.
Understanding Contact Points
Every comfort issue traces back to where your body meets the bike. These five contact points bear all your weight and absorb all the road vibration for hours at a time.
The Five Contact Points
| Contact Point | Common Issues | Impact Level |
|---|---|---|
| Saddle | Saddle sores, numbness, chafing | Critical |
| Hands (Left) | Numbness, pain, blisters | High |
| Hands (Right) | Numbness, pain, blisters | High |
| Foot (Left) | Hot foot, numbness, pain | Moderate |
| Foot (Right) | Hot foot, numbness, pain | Moderate |
Weight distribution across these points changes constantly as you ride. Climbing shifts weight to the saddle. Descending loads the hands. Sprinting engages the feet. Problems arise when one contact point bears too much load for too long.
The Triangle of Support
Your body forms a triangle between saddle, handlebars, and pedals. The shape of this triangle—determined by your bike fit—affects comfort more than almost any other factor.
Aggressive position (racing):
- More weight on hands
- Less weight on saddle
- Increased neck strain
- Better power transfer
Upright position (touring):
- More weight on saddle
- Less weight on hands
- Reduced neck strain
- More comfortable long-term
For bikepacking, most riders benefit from a more upright position than they'd use for fast road riding. The goal isn't maximum speed—it's sustainable comfort over many hours and days.
Saddle Issues: The #1 Comfort Problem
Saddle discomfort causes more riders to quit bikepacking than any other issue. The good news: most saddle problems are solvable with the right approach.
Types of Saddle Discomfort
Pressure pain:
- Aching in sit bones
- Discomfort that builds throughout the ride
- Usually indicates saddle width mismatch or positioning issue
Chafing and saddle sores:
- Skin irritation from friction
- Can progress to infected sores
- Hygiene and lubrication are key factors
Numbness:
- Tingling or loss of sensation in soft tissue
- Indicates pressure on nerves or blood vessels
- Requires immediate attention—long-term numbness causes damage
Detailed solutions: Preventing and Treating Saddle Sores
Quick Saddle Fixes
On trail:
- Check saddle is level (use phone level app)
- Adjust height—even 5mm matters
- Move saddle forward or back on rails
- Apply chamois cream liberally
- Stand frequently to relieve pressure
Before your trip:
- Get sit bone measurement for proper saddle width
- Test saddle extensively before committing
- Break in shorts and saddle together
- Establish hygiene routine
Saddle Selection Basics
| Rider Type | Saddle Characteristics |
|---|---|
| Narrow sit bones (under 100mm) | Narrower saddle (130-145mm) |
| Average sit bones (100-130mm) | Medium saddle (145-155mm) |
| Wide sit bones (over 130mm) | Wider saddle (155-170mm) |
| Upright position | More padding acceptable |
| Aggressive position | Less padding, more cutout |
Your ideal saddle depends on your anatomy and riding position—not on what works for other riders. What feels terrible for one person may be perfect for another.
Hand and Wrist Comfort
Numb, tingling, or painful hands affect most bikepackers at some point. Unlike saddle issues that build over days, hand problems can develop within hours.
Understanding Hand Numbness
Two nerves run through your hands and are vulnerable to cycling pressure:
Ulnar nerve (outer hand):
- Ring finger and pinky numbness
- Caused by pressure on handlebar outside
- "Cyclist's palsy" or handlebar palsy
Median nerve (palm center):
- Thumb, index, middle finger numbness
- Carpal tunnel area pressure
- Often from gripping too tightly
Detailed solutions: Hand Numbness and Handlebar Comfort
Prevention Strategies
Grip position:
- Change hand positions every 10-15 minutes
- Avoid death-gripping the bars
- Keep wrists neutral, not bent
Equipment:
- Padded gloves with palm gel
- Ergonomic grips with wing support
- Proper bar tape thickness
- Consider adding bar ends or aero bars
Bike fit:
- Reduce reach if stretched too far
- Raise handlebars to reduce hand loading
- Check that weight isn't too far forward
Quick Hand Relief
When numbness starts on trail:
- Shake hands out while coasting
- Change grip position immediately
- Consciously relax your grip
- Shift weight back toward saddle
- Stop and stretch if numbness persists
Knee Pain: The Warning Sign
Knee pain is your body's warning that something is wrong with your bike fit, pedaling technique, or training load. Unlike muscle soreness, knee pain signals potential injury.
Types of Cycling Knee Pain
| Location | Common Cause | Typical Fix |
|---|---|---|
| Front of knee | Saddle too low, high gear grinding | Raise saddle, spin easier gear |
| Back of knee | Saddle too high, overextension | Lower saddle |
| Inside of knee | Cleat angle, Q-factor | Adjust cleat rotation |
| Outside of knee | IT band, cleat angle | Stretch IT band, adjust cleats |
Detailed solutions: Knee Pain Prevention for Cyclists
The Saddle Height Connection
Saddle height affects knee health more than any other fit parameter. Even small errors compound over thousands of pedal strokes.
Signs saddle is too low:
- Pain at front of knee
- Feeling of "mashing" rather than spinning
- Quads burn before cardiovascular limit
Signs saddle is too high:
- Pain at back of knee
- Hips rock side to side when pedaling
- Reaching for pedals at bottom of stroke
Cadence Matters
High-gear grinding stresses knees far more than spinning an easier gear. For knee health:
- Target 80-100 RPM cadence
- Shift to easier gear before grinding
- Use low gears on climbs rather than pushing through
- Accept slower speed to protect joints
This is especially important on loaded bikepacking bikes, where the temptation to push big gears up hills is strong.
Neck and Back Pain
Long hours in a cycling position stress your neck and back in ways that daily life doesn't prepare you for. The combination of a forward lean, head raised to see ahead, and vibration creates a perfect storm for discomfort.
Why Cyclists Get Neck Pain
The head-up position:
- Your head weighs 10-12 pounds
- Looking forward while bent over strains neck extensors
- Hours of this position cause fatigue and pain
Handlebar reach:
- Reaching too far forward increases strain
- Arms locked straight transfers vibration to spine
- Aggressive positions are harder to maintain
Solutions overview: Neck and Back Pain Solutions
Quick Neck Relief
On the bike:
- Look down periodically (when safe)
- Shrug shoulders to release tension
- Change hand positions to shift body angle
- Consciously relax death-grip on bars
At rest stops:
- Neck rolls—slow circles both directions
- Chin tucks—bring chin to chest
- Side stretches—ear toward shoulder
- Shoulder blade squeezes
Handlebar Setup for Comfort
Higher handlebars reduce neck strain significantly:
- Flip stem upward if reversible
- Add spacers under stem
- Consider shorter stem (reduces reach)
- Riser bars put grips higher than drop bars
For bikepacking, the slight aerodynamic penalty of a more upright position is usually worth the comfort gain over multi-day rides.
Foot Comfort and Hot Foot
Foot problems are less common than saddle or hand issues but can be equally ride-ending. "Hot foot"—burning pain in the ball of the foot—is the most frequent complaint.
What Causes Hot Foot
Pressure concentration:
- Pedal pressure focuses on small area
- Nerves between metatarsals get compressed
- Pain and numbness result
Contributing factors:
- Stiff-soled cycling shoes
- Tight shoe fit
- Hot weather (feet swell)
- Long climbs in same position
Detailed solutions: Foot Comfort and Hot Foot Prevention
Prevention Strategies
Shoe fit:
- Size up for touring (feet swell)
- Ensure wide toe box
- Loosen straps as day progresses
Pedal interface:
- Larger pedal platform spreads pressure
- Move cleats back toward heel (if clipped in)
- Consider flat pedals for touring
On trail relief:
- Stop and remove shoes
- Massage forefoot
- Loosen shoes significantly
- Point toes down periodically while riding
Bike Fit for Loaded Touring
Everything changes when you add 15-40 pounds of gear to your bike. A fit that works perfectly unloaded may cause problems when you're carrying camping equipment.
How Load Affects Fit
Weight on rear:
- Bike handles differently
- Climbing position shifts forward
- May need saddle adjustment
Weight on front (handlebar bag):
- Steering feels heavier
- More weight on hands
- May need to raise bars
Distributed load:
- Best for handling
- Minimizes fit changes
- Requires more bag positions
Complete bike fit guide: Bike Fit for Loaded Bikepacking
Test Loaded Before You Go
Critical mistake: fitting your bike unloaded, then adding gear for the trip. Always:
- Load bike fully before final fit adjustments
- Ride loaded for at least an hour
- Note any comfort changes from unloaded riding
- Adjust and re-test
Even experienced bikepackers sometimes need to readjust fit for different load configurations.
Prevention vs. Treatment Mindset
The most important comfort principle: prevention beats treatment every time. An hour of preparation saves days of suffering.
Pre-Trip Prevention
Physical preparation:
- Build saddle time gradually before trips
- Strengthen core for stability
- Improve flexibility in key areas
- Don't jump from zero riding to multi-day tour
Equipment preparation:
- Test all gear extensively
- Verify bike fit with expected load
- Break in new saddles and shoes
- Confirm shorts/chamois combination works
Knowledge preparation:
- Know early warning signs
- Carry appropriate treatments
- Have adjustment tools accessible
- Plan bail-out options if problems develop
Building endurance: Building Saddle Time and Conditioning
Early Intervention
The moment you notice a problem developing:
- Stop and assess—don't push through hoping it improves
- Make adjustments—change positions, apply products, loosen shoes
- Monitor closely—if problem continues, more aggressive action needed
- Accept reality—sometimes the right choice is stopping
The difference between a minor issue and a trip-ending problem is often 30 minutes of ignoring warning signs.
Recovery Between Riding Days
Multi-day comfort isn't just about the hours on the bike. What you do in the evening and overnight significantly affects how you feel the next morning.
Evening Routine
Immediately after riding:
- Get out of cycling clothes
- Clean and dry contact point areas
- Apply treatment to any developing issues
- Stretch major muscle groups
Before sleep:
- Elevate legs if possible
- Apply moisturizer to hands/feet
- Check skin for developing problems
- Eat protein for muscle recovery
Detailed strategies: Recovery Strategies Between Riding Days
Sleep Quality Matters
Poor sleep compounds physical stress. Prioritize:
- Adequate insulation from ground
- Proper sleeping pad for your body
- Managing temperature through the night
- Enough sleep hours (don't start too early every day)
Your overnight recovery determines tomorrow's comfort ceiling.
Essential Comfort Gear
Some items provide comfort benefits far exceeding their weight penalty. Consider carrying:
High-Value Comfort Items
| Item | Weight | Benefit |
|---|---|---|
| Chamois cream | 2-4 oz | Prevents saddle sores |
| Anti-chafe balm | 1-2 oz | Prevents multiple chafing zones |
| Padded gloves | 3-4 oz | Reduces hand pressure |
| Compact foam roller | 8-12 oz | Enables proper recovery |
| Ibuprofen | Under 1 oz | Reduces inflammation |
| Compression socks | 2 oz | Improves recovery |
What to Skip
Some "comfort" items aren't worth carrying:
- Excessive saddle padding (causes more problems)
- Heavy seat cushion covers
- Multiple pairs of padded shorts (one quality pair better)
- Complex massage tools
Weight matters on a bikepacking trip. Choose items with proven benefits.
When to Push Through vs. When to Stop
Not every discomfort requires stopping, but some signals demand immediate attention.
Push Through These
Normal adaptation discomfort:
- General muscle tiredness
- Mild saddle soreness early in trip
- Slight hand fatigue
- Overall body fatigue
Minor issues with management:
- Hot spots responding to adjustment
- Tightness that improves with stretching
- Discomfort that stays stable (not worsening)
Stop for These
Numbness that doesn't resolve:
- Hand numbness persisting after position change
- Genital numbness (stop immediately)
- Foot numbness continuing after shoe loosening
Sharp or specific pain:
- Knee pain beyond mild ache
- Sharp lower back pain
- Joint pain that worsens with continued riding
Visible problems:
- Open saddle sores
- Significant swelling
- Skin breakdown
Building Comfort Over Time
Comfort isn't just about equipment—it's about adapting your body to the demands of bikepacking.
Progressive Adaptation
Sit bones adapt:
- Initial soreness is normal
- Typically takes 2-3 weeks of regular riding
- Pushing through too fast causes worse problems
- Consistency matters more than intensity
Hands toughen:
- Calluses develop at pressure points
- Grip strength improves
- Position awareness becomes automatic
Core strengthens:
- Better weight support
- Less load on hands and saddle
- More stable platform
Conditioning guide: Building Saddle Time and Conditioning
The Long Game
Experienced bikepackers often say their first trips were the hardest—not because of fitness, but because their bodies hadn't adapted. Give yourself time to build:
- Multiple shorter trips before long expeditions
- Gradually increasing daily distances
- Consistent riding between trips
Patience in building comfort now prevents suffering later.
Common Mistakes
Years of helping bikepackers has revealed consistent mistakes that cause comfort problems:
Equipment Mistakes
Saddle shopping by appearance:
- Pretty saddles aren't necessarily comfortable
- Width matters more than padding
- Test before committing
Skipping chamois cream:
- "I've never needed it" until you do
- Prevention is easier than treatment
- Weight penalty is minimal
One position only:
- No hand position changes
- Staying seated constantly
- Fixed foot position on pedals
Behavior Mistakes
Ignoring early warnings:
- "It'll go away" mentality
- Pushing through numbness
- Not adjusting when problems start
Inadequate preparation:
- Long tour as first trip of season
- New equipment not tested
- No bike fit check with load
Macho suffering:
- "Real bikepackers push through"
- Hiding problems from riding partners
- Seeing discomfort as weakness
Comfort by Trip Length
Different trip lengths require different comfort strategies:
Overnight/Weekend (1-2 days)
- Existing fitness usually sufficient
- Minor fit issues may not appear
- Recovery time available after
- Lower stakes if problems develop
Focus on: Basic bike fit, chamois cream, hand position variety
Week-Long (5-7 days)
- Saddle sores can develop
- Cumulative fatigue becomes factor
- Mid-trip recovery critical
- Problems compound without intervention
Focus on: Full prevention protocol, daily skin care, recovery routine
Extended (2+ weeks)
- Body fully adapts (or breaks down)
- Equipment wear becomes factor
- Mental fatigue affects physical tolerance
- Resupply opportunities for comfort items
Focus on: Sustainable practices, replacement supplies, rest day planning
FAQ
How long until saddle soreness goes away?
For new cyclists, initial sit bone soreness typically resolves within 2-3 weeks of consistent riding. If soreness persists or worsens, the saddle may be wrong for your anatomy. Actual saddle sores (skin issues) require different treatment—see our saddle sores guide.
Is some hand numbness normal?
Mild, temporary numbness that resolves immediately with position change is common. Persistent numbness, numbness that takes more than a few minutes to resolve, or numbness that occurs without pressure is not normal and indicates a problem that needs addressing.
Should I stretch before riding?
Light dynamic stretching (leg swings, arm circles) is beneficial before riding. Save deep static stretching for after riding or during long breaks. Cold muscles don't respond well to intense stretching.
Does bike fit need to change for bikepacking?
Usually yes, though changes may be subtle. Loaded bikes handle differently, and the long hours of bikepacking favor more comfortable positions than aggressive racing fits. Test your fit with full load before any trip.
How much chamois cream should I use?
More than you think. Apply generously to both skin and chamois pad. Reapply at lunch stops on long days. The weight of carrying cream is far less than the suffering of saddle sores.
When should I see a doctor about cycling pain?
Seek medical attention for: persistent numbness that doesn't resolve, sharp joint pain, signs of infection in saddle sores, any concerning symptoms that don't improve with rest and bike adjustments.
Related Guides
Specific Issues:
- Preventing and Treating Saddle Sores - Complete saddle sore prevention
- Hand Numbness and Handlebar Comfort - Solve hand problems
- Knee Pain Prevention - Protect your knees
- Neck and Back Pain Solutions - Upper body comfort
- Foot Comfort and Hot Foot - Happy feet
Bike Setup:
- Bike Fit for Loaded Bikepacking - Fit with gear
- Complete Bikepacking Maintenance Guide - Keep bike running right
Prevention and Recovery:
- Stretching and Mobility Routine - Stay flexible
- Recovery Strategies - Bounce back daily
- Building Saddle Time - Condition your body
- Chafing Prevention - All friction zones
Getting Started:
- Your First Bikepacking Trip - Trip planning basics
- What to Wear Bikepacking - Clothing choices
Physical comfort isn't a luxury—it's what makes bikepacking sustainable and enjoyable. The difference between riders who love the sport and those who quit often comes down to solving comfort problems.
Prevent what you can. Address problems early. Listen to your body.
Then ride as far as you want to go.


