Bike Fit for Loaded Bikepacking: How Gear Changes Everything
20+ years testing gear in Colorado backcountry
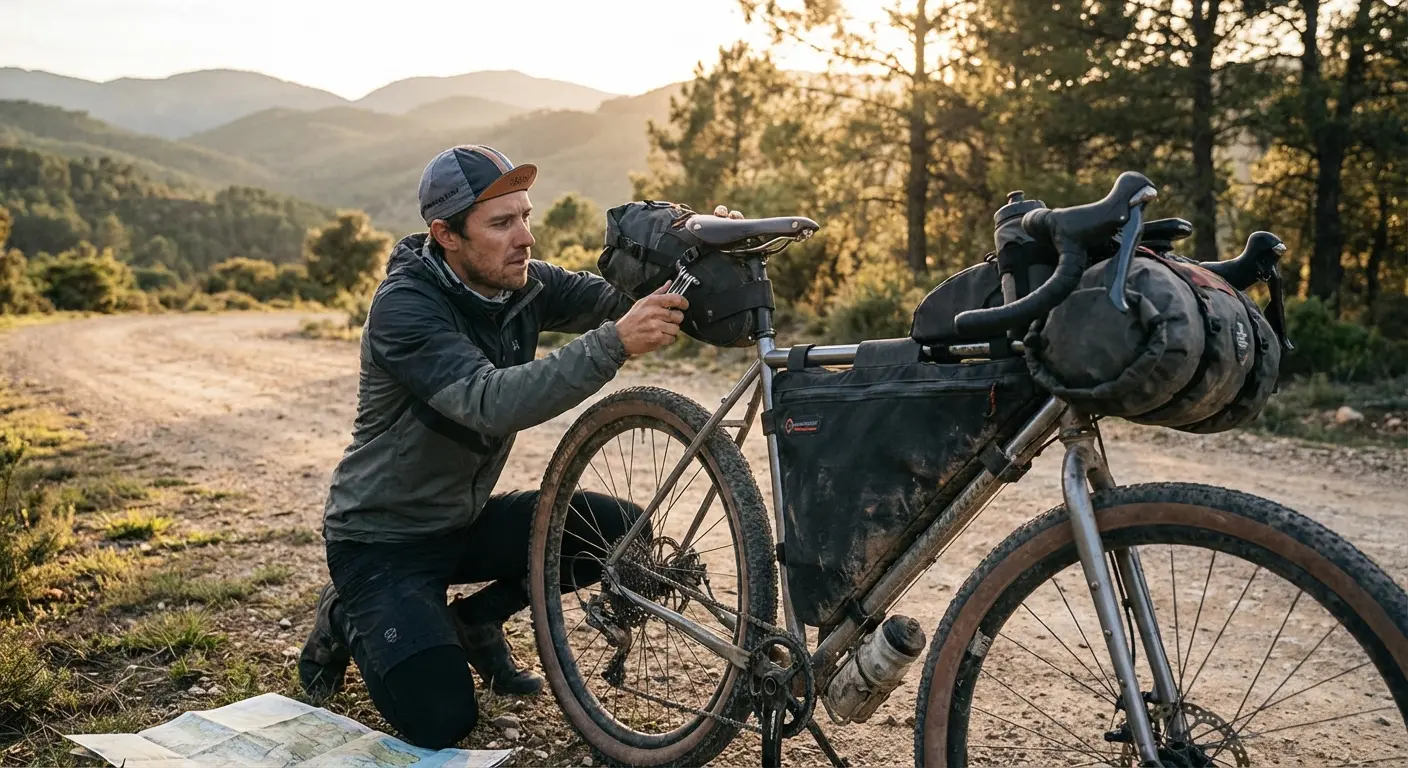
Everything Changes When You Add Weight
A bike fit that works perfectly unloaded can cause problems the moment you add camping gear. Weight distribution shifts, handling changes, and positions that felt fine for two hours become problematic over two days.
Most bike fits are done unloaded. The fitter optimizes position for your body, bike, and riding style—but without 25 pounds of camping gear attached. Then you load up for a bikepacking trip and wonder why everything feels wrong.
Loaded bikes require fit adjustments. The weight affects how the bike handles, how you balance on it, and where pressure concentrates. Understanding these effects lets you anticipate and adapt, arriving at a comfortable loaded position instead of suffering through your first days on trail.
This guide covers how gear affects fit and what adjustments help. For specific comfort issues, see our Complete Bikepacking Comfort Guide.
How Load Affects Your Bike
Understanding the changes helps you compensate appropriately.
Weight Distribution Effects
Rear-heavy loading (saddle bag, rear rack):
- Rear end drops
- Front end lightens
- Steering feels quick/nervous
- Climbing position shifts forward naturally
Front-heavy loading (large handlebar bag):
- Front end drops
- Steering feels slow/heavy
- More weight on hands
- Climbing requires weight shift back
Balanced loading (distributed bags):
- Most neutral handling
- Weight distributed more evenly
- Minimizes fit changes needed
- Preferred approach for long tours
Center of Gravity Changes
Higher center of gravity:
- Bags mounted high on racks
- Bike feels less stable
- Affects cornering confidence
- More susceptible to wind
Lower center of gravity:
- Frame bags, low panniers
- More stable handling
- Better weight distribution
- Modern bikepacking preference
Compliance Changes
Softer ride loaded:
- Tires compress more
- Suspension (if equipped) sags deeper
- Frame flexes differently
- May affect saddle height effectively
Saddle Position Adjustments
Your saddle position often needs tweaking for loaded riding.
Height Considerations
Why height might need adjustment:
- Loaded bike compresses tires more
- Effective standover may decrease
- Suspension sag increases
- You might be sitting differently
Typical adjustment:
- Often 2-5mm lower than unloaded
- Test with full load before finalizing
- Small changes make big difference
Fore-Aft Position
Rear-loaded bikes:
- Weight pulls you back
- May need saddle slightly forward
- Maintains balanced position
Front-loaded bikes:
- Weight pulls you forward
- May need saddle slightly back
- Counteracts forward pull
Saddle Angle
Standard advice: level saddle
However, with heavy handlebar bags:
- Some riders prefer slight nose-down
- Prevents sliding forward into bar weight
- Experiment cautiously—too much causes hand problems
Monitor for issues:
- Forward sliding = may need slight nose up
- Pressure on hands increasing = check saddle angle
Handlebar Position
Handlebar height and reach often need adjustment for loaded touring.
The Case for Higher Bars
Loaded riding favors more upright position:
- Hours in saddle (not racing)
- Need to see road/trail clearly
- Comfort over aerodynamics
- Reduced hand/wrist load
How much higher?
- Start with 20-30mm above racing position
- Many touring riders go higher
- Bars at or above saddle height common
Reach Adjustments
Why shorter reach often helps:
- More upright body position
- Less weight on hands
- Reduced neck strain
- Easier breathing
Implementation:
- Shorter stem
- Bars with less reach
- Raised bars effectively reduce reach too
Specific Bar Considerations
Drop bars:
- Flared drops provide more control loaded
- Tops should allow comfortable upright riding
- Hood position is primary for touring
Flat bars:
- Often easier to set up comfortably
- Add bar ends for position variety
- Width affects control with front loads
Contact Point Changes
Each contact point experiences different loading when the bike carries gear.
Saddle Loading
Changes:
- More time in saddle (fewer out-of-saddle efforts)
- Climbing position may shift
- Longer sustained pressure
Implications:
- Saddle comfort even more critical
- Chamois cream more important
- Position variety more difficult
Hand Loading
With front bags:
- More weight on hands
- Steering heavier
- Increased pressure on wrists
Mitigation:
- Raise handlebars
- Add padding (bar tape, gloves)
- Ergonomic grips on flat bars
Foot Loading
Generally similar to unloaded:
- Power output often lower (touring pace)
- Longer time in fixed position
- May need more foot relief
See: Foot Comfort Guide
Testing Your Loaded Fit
Don't wait until the trip to discover problems.
Pre-Trip Protocol
Load test ride:
- Pack bike exactly as you will for trip
- Ride for at least 1-2 hours
- Include terrain similar to trip (climbing, descending)
- Note any comfort issues
- Adjust and test again
What to monitor:
- Saddle comfort different than usual?
- More weight on hands?
- Neck/back strain increased?
- Handling feel safe and controllable?
Progressive Loading
If new to bikepacking:
- First test with half load
- Note handling changes
- Add remaining weight
- Compare and adjust
This reveals which specific bags cause which effects.
The Real Test
Nothing replaces actual overnight trips for fit testing:
- Multi-hour sustained riding reveals issues
- Cumulative effects appear by day two
- Better to discover problems close to home
Fit by Bag Configuration
Different bag setups create different fit needs.
Handlebar Bag Dominant
Common setup:
- Large handlebar roll (8-15L)
- Frame bag
- Saddle bag
Fit considerations:
- Most weight on hands
- Steering affected significantly
- May need bars raised substantially
- Shorter stem can help
Saddle Bag Dominant
Common setup:
- Large saddle bag (10-20L)
- Frame bag
- Small handlebar bag
Fit considerations:
- Light front end
- Rear wheel traction increased
- Climbing position shifts forward
- Steering may feel nervous
Frame Bag Dominant
Common setup:
- Full frame bag
- Moderate handlebar bag
- Moderate saddle bag
Fit considerations:
- Most balanced weight distribution
- Minimal handling changes
- Often requires least fit adjustment
- Lower center of gravity
Bikepacking + Backpack
Not recommended but sometimes necessary:
- Weight on your body, not bike
- Core fatigue increases
- Breathing restricted
- Back pain likely
- Fit adjustments can't fully compensate
If you must use a backpack:
- Keep it very light
- Use hip belt effectively
- Take it off at rest stops
- Consider different gear strategy
For complete bag guidance: Complete Bag Storage Guide
Featured Products
Park Tool AK-5 Pro Hex Kit
Making fit adjustments requires proper tools. This kit includes the hex wrenches needed for stem bolts, seatpost clamps, and saddle rails. Quality tools make adjustments easier and prevent damage to bolts. The handles provide good leverage for properly torquing clamp bolts. Essential for anyone doing their own fit adjustments. Keep a multi-tool on the bike for trail adjustments, but do initial setup with proper tools.
- Quality hex wrenches
- Proper leverage
- Essential for fit
- Prevents bolt damage
- Professional quality
Pro Bike Tool Torque Wrench
Carbon components and lightweight stems require precise torque—too loose and they slip, too tight and they crack. This affordable torque wrench covers the 2-20Nm range common in cycling. Especially important for seatpost clamps where you're making small height adjustments. The click-type mechanism tells you when target torque is reached. An investment that protects your components and ensures adjustments stay put.
- 2-20Nm range
- Click-type mechanism
- Protects components
- Ensures secure adjustment
- Affordable
Redshift ShockStop Stem
A suspension stem absorbs vibration before it reaches your hands, reducing fatigue on rough roads. Particularly valuable when carrying a heavy handlebar bag that transmits more shock. The 20mm of travel is noticeable but not mushy. Adds some weight but the comfort benefit is real, especially on gravel and rough pavement. May allow slightly lower handlebar position than otherwise comfortable. Worth considering for rough-road touring.
- 20mm travel
- Reduces hand fatigue
- Works with heavy front loads
- Helps on rough surfaces
- Adjustable firmness
Ritchey Adjustable Stem
When you're not sure exactly where your handlebars need to be, an adjustable stem lets you experiment. Adjust angle on the fly (while stopped) to find the perfect position. Once you know what works, you can replace with a fixed stem or just keep it. Useful when different trips or different loads require different positions. Not as clean-looking as fixed stems but very practical for fit experimentation.
- Adjustable angle
- Find perfect position
- Good for experimentation
- Solid construction
- Multiple lengths
Thomson Elite Seatpost
A quality seatpost makes height adjustments easy and holds position reliably. The Thomson Elite is a benchmark for reliability—set it once and it stays. The single-bolt design is straightforward to adjust. Available in various diameters and lengths. For riders making frequent saddle adjustments between loaded and unloaded riding, a quality post that doesn't slip is worth the investment. The machined aluminum finish is practically indestructible.
- Reliable hold
- Easy to adjust
- Durable construction
- Various sizes
- Industry standard
Position by Terrain
Different terrain demands different position emphasis.
Climbing
Challenges loaded:
- Harder to stand and shift weight
- More sustained seated effort
- Rear weight can help traction
- Front can lift on steep grades
Position adjustments:
- Slide forward on saddle
- Hands near stem for weight forward
- Consider lower gear than usual
Descending
Challenges loaded:
- Braking distances increase
- Weight shifts forward under braking
- Rear wheel can skip
- Steering affected by front bags
Position adjustments:
- Move weight back
- Hands in drops or grip ends
- Feather brakes rather than grabbing
Rough Roads
Challenges loaded:
- More vibration transmitted
- Bags can bounce/shift
- Fatigue increases faster
Position adjustments:
- Slightly loose grip
- Bent elbows to absorb shock
- Weight off saddle over obstacles
Wind
Challenges loaded:
- More surface area for wind to push
- Handling affected more
- Crosswinds especially challenging
Position adjustments:
- Lower position helps (if comfortable)
- Grip firmly through gusts
- Be prepared for sudden handling changes
Common Fit Mistakes
Avoid these errors when setting up for loaded riding.
Fitting Unloaded
The mistake: Doing a bike fit or setting up position with an empty bike, then wondering why it feels wrong loaded.
The fix: Always test fit with full load. Even a short ride reveals issues.
Copying Fast Riders
The mistake: Adopting an aggressive, low position because it looks fast. Then suffering through multi-day tours.
The fix: Bikepacking isn't racing. Prioritize sustainable comfort over marginal aero gains. Higher bars are fine.
Never Adjusting
The mistake: Setting fit once and never touching it, even when discomfort develops.
The fix: Fit should evolve with experience. Adjust when issues arise. Don't suffer through fixable problems.
Ignoring Warning Signs
The mistake: Dismissing pain as "normal" part of bikepacking instead of addressing fit causes.
The fix: Most pain indicates something adjustable. See specific guides for each comfort issue:
Professional Fitting
When to consider professional help.
When DIY Isn't Enough
Consider a professional fit if:
- Persistent issues despite self-adjustments
- Previous injury affecting position
- Unusual body proportions
- Planning major expedition
- New to cycling
Choosing a Fitter
Look for:
- Experience with touring/bikepacking (not just racing)
- Willingness to discuss loaded riding
- Understanding that comfort matters
- Good reputation from other tourers
Ask about:
- Their approach to touring fit
- Whether you can bring loaded bike
- Follow-up adjustments included
Cost-Benefit
Professional fits cost $100-300+ but can:
- Prevent injury
- Increase comfort significantly
- Save money on trial-and-error equipment
- Provide lasting knowledge
For serious bikepackers, a quality fit often pays for itself.
FAQ
Should I get fit before buying bags or after?
After. Bag choice affects weight distribution, which affects fit. Buy and load bags, then finalize fit. You may still need minor adjustments as you optimize packing.
How much fit change is normal for loaded riding?
Varies by load size and distribution. Riders carrying 25+ pounds often adjust saddle height, handlebar height, or both. Smaller loads may need minimal change. The key is testing.
Can I have the same fit for loaded and unloaded riding?
Usually not perfectly. Many riders compromise toward a loaded-friendly fit that still works unloaded. Others adjust between trip and training rides. Quick-adjust components help.
My loaded bike feels unstable. Is that a fit issue?
Possibly, but also possibly weight distribution. Try balancing load better before making fit changes. Front and rear should be somewhat balanced. See bag configuration section.
Will a different saddle help with loaded riding comfort?
Maybe. Loaded riding means more time in saddle, so saddle fit becomes more critical. A saddle that's marginal unloaded may become problematic loaded. Address fit first, then consider saddle if needed.
How do I know if my problems are fit-related or just adaptation?
Adaptation issues improve over days/weeks as body adjusts. Fit issues persist or worsen. If problems don't improve with consistent riding, it's likely fit. Make one adjustment at a time and test.
Related Guides
- Complete Bikepacking Comfort Guide - Full comfort overview
- Complete Bag Storage Guide - Bag options and placement
- Pre-Trip Inspection Checklist - Full preparation checklist
- Your First Bikepacking Trip - Planning basics
- Building Saddle Time - Conditioning your body
Loaded bike fit isn't complicated, but it is different from unloaded fit. Test with full load, adjust based on actual riding experience, and don't accept discomfort as inevitable.
The right position exists. Find it before you need to ride 50 miles with it.
Load smart, fit smart, ride comfortable.


