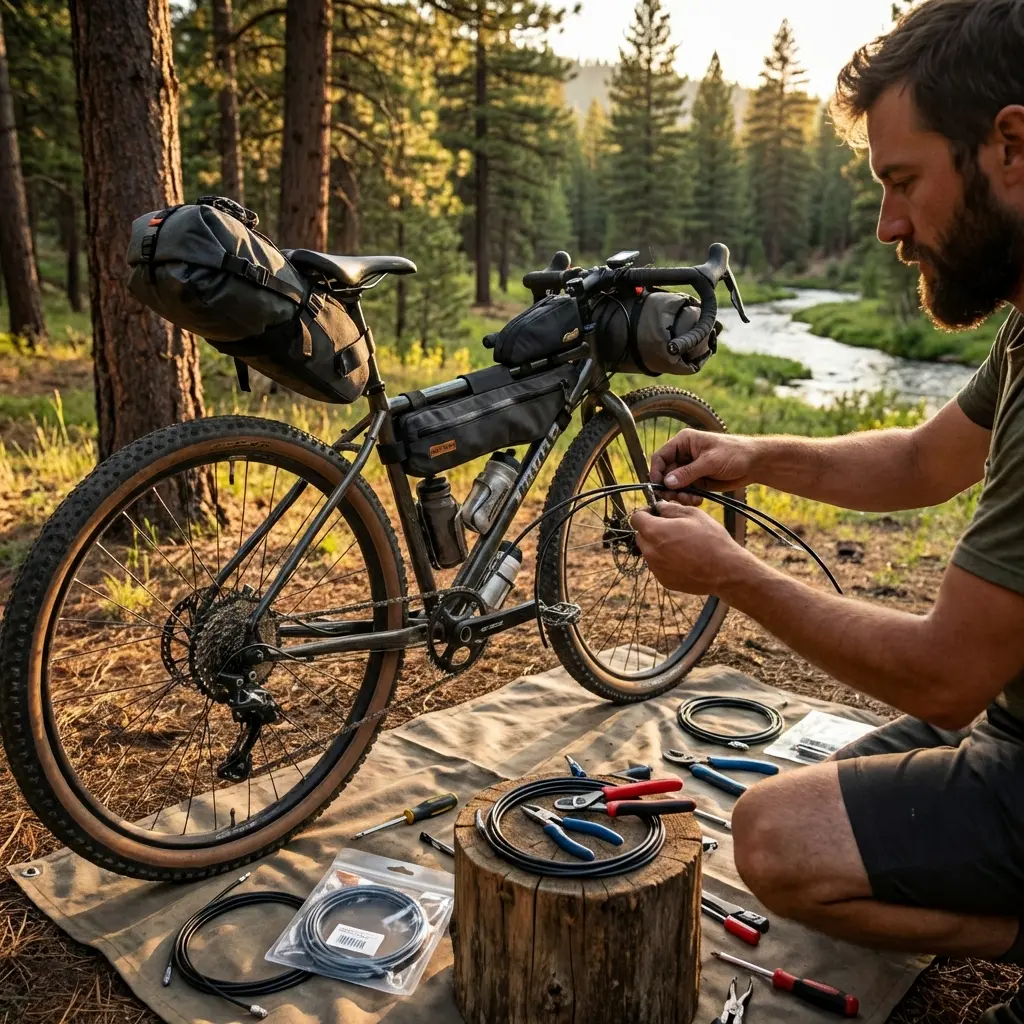
Shift Cable and Brake Cable Replacement for Bikepacking
20+ years testing gear in Colorado backcountry
The Hidden Weak Link
Cables work invisibly until they fail. A frayed shift cable means no shifting. A broken brake cable means reduced stopping power. Regular inspection and timely replacement prevent unpleasant surprises.
Inside your housing, thin steel wires transmit every shift command and braking input. They flex thousands of times per ride, resist corrosion from weather, and eventually wear out. Unlike a squeaky chain or a rubbing brake, cable wear is invisible until something goes wrong.
For mechanical brake and derailleur systems, cables are critical components. This guide covers inspection, replacement timing, and carrying spares for remote bikepacking. Master cable maintenance and you'll never be stranded by a simple wire failure.
For the complete maintenance picture, see our Complete Bikepacking Maintenance Guide. For derailleur-specific issues, check our Derailleur Adjustment Guide.
Anatomy of Cable Systems
Understanding the components helps you diagnose and fix problems.
Inner Cable
The steel wire that transmits force:
- Head/nipple: Barrel or pear-shaped end that anchors in shifter or brake lever
- Wire strands: Multiple thin wires twisted together
- Anchor point: Where cable attaches to derailleur or brake
Materials:
- Stainless steel: Corrosion resistant, standard choice
- Galvanized steel: Cheaper, rusts faster
- Coated: Teflon or similar coating reduces friction
Housing
The outer sleeve that guides the cable:
- Shift housing: Linear (straight) wires inside, resists compression
- Brake housing: Coiled (spiral) wire inside, handles higher loads
- Liner: Plastic inner tube for reduced friction
Hardware
- Ferrules: Metal caps on housing ends
- End caps: Crimp-on caps preventing cable fray
- Cable stops: Frame bosses where housing terminates
Inspection: When Cables Need Attention
Visual Signs
At the anchor bolt (derailleur/brake):
- Frayed strands spreading outward
- Kinked or bent cable
- Corrosion or rust discoloration
At the shifter/lever head:
- Frayed strands at nipple
- Corrosion in head area
- Worn nipple edges
Housing:
- Cracked or split outer jacket
- Kinked sections that don't straighten
- Visible rust at cut ends
- Loose or missing ferrules
Performance Signs
Shift cable problems:
- Shifting feels sluggish or stiff
- Delayed shifts even with proper tension
- Shifts improve when cable is manually pushed
- Inconsistent indexing
Brake cable problems:
- Lever feels spongy or soft
- More lever travel needed for braking
- Lever doesn't return fully
- Braking power decreasing
High-Wear Points
Check these areas carefully:
| Location | What Happens | Signs |
|---|---|---|
| Anchor bolt | Cable is clamped, crushed | Frayed strands, flattened profile |
| Sharp housing bends | Friction wear at curves | Stiff feel, visible wear through housing |
| Under bottom bracket | Exposure to grit and water | Corrosion, contaminated housing |
| Shifter/lever entry | Repeated flexing | Frayed strands at nipple |
When to Replace
Preventive Replacement
Annually or every 3,000-5,000 miles:
- Fresh cables ensure reliable shifting and braking
- Eliminates concern about unseen wear
- Good pre-trip maintenance
Before major expeditions:
- Remote routes demand reliability
- No bike shops means self-sufficiency
- Peace of mind worth the cost
Reactive Replacement
Replace immediately if:
- Any visible fraying
- Strand breakage (even one)
- Significant corrosion
- Kinks that won't straighten
- Sluggish feel that doesn't respond to lubrication
When Housing Needs Replacement
Replace housing when:
- Cut ends are corroded or contaminated
- Outer jacket is cracked or split
- Kinked beyond straightening
- Significant resistance when pulling new cable through
- Ferrules are damaged or missing
Replacement Procedure
What You'll Need
- New cables (correct type for shifter/brake lever)
- Housing (shift or brake as appropriate)
- Cable cutters (proper tool makes clean cuts)
- Ferrules and end caps
- Allen keys for anchor bolts
- Wire cutters or end cap crimping tool
Shift Cable Replacement
Removal:
- Shift to smallest cog/ring (releases cable tension)
- Loosen anchor bolt on derailleur
- Pull cable free from derailleur
- Push cable through housing toward shifter
- Remove cable from shifter (access varies by model)
Installation:
- Thread new cable through shifter mechanism
- Route through housing sections
- Ensure ferrules are seated in all cable stops
- Thread through derailleur anchor
- Set cable tension with barrel adjuster at mid-range
- Pull cable taut, tighten anchor bolt
- Test shifting through full range
- Fine-tune cable tension
- Trim excess cable (leave 2-3 inches)
- Crimp end cap
Brake Cable Replacement
Removal:
- Release brake quick-release if available
- Loosen cable anchor at brake caliper
- Pull cable free
- Push cable through housing toward lever
- Remove from brake lever
Installation:
- Thread cable through lever (barrel nipple usually)
- Route through housing
- Thread through caliper anchor
- Set cable tension (brake pads should contact rim/rotor with moderate lever pull)
- Tighten anchor bolt
- Test braking feel
- Adjust as needed
- Trim and cap cable
Tips for Clean Cuts
For housing:
- Cut with sharp, quality cutters
- Inspect cut end—should be round, not crushed
- Use awl or pick to clear liner if needed
- Install ferrule immediately
For cable:
- Cut at 45-degree angle
- Clean cut prevents fraying
- Crimp end cap immediately
- Apply drop of superglue to end if desired
Carrying Spares for Bikepacking
What to Carry
Minimum (weekend trips):
- One shift cable (inner wire only)
- One brake cable (inner wire only)
- A few ferrules and end caps
Extended trips:
- Two shift cables
- Two brake cables
- Short sections of housing (6-12 inches each type)
- Spare ferrules and end caps
- Small lube bottle
Why Carry Cables
Cables fail in several ways:
- Fray at anchor bolt (most common)
- Break at shifter head
- Corrosion from water exposure
- Kink from crash or impact
Without spare cables, a failure means:
- No shifting (walk or single-speed)
- Reduced braking (one brake only)
- Potential for dangerous situations
Trail Cable Replacement
When proper cable replacement isn't possible, see our Emergency Field Repairs Guide for creative improvisation techniques.
Challenges:
- Limited tools
- Limited time
- No ideal conditions
Realistic expectations:
- Full cable/housing replacement difficult on trail
- Inner cable replacement is achievable
- Focus on getting functional, not perfect
Trail process:
- Use existing housing if possible
- Thread new inner cable through
- Approximate tension settings
- Fine-tune later when conditions allow
Featured Products
Jagwire Pro Cable Kit
The complete replacement solution for both shifting and braking. Jagwire Pro kits include pre-stretched stainless cables that resist cable stretch, sealed compressionless housing that maintains crisp feel, and all the ferrules, end caps, and hardware for a full replacement. The sealed housing is especially valuable for bikepacking—it keeps water and grit out far better than open-coil housing. One kit services both front and rear brakes plus both derailleurs. Fresh cables with quality housing transforms shifting and braking feel.
- Pre-stretched cables
- Sealed housing
- All hardware included
- Shift and brake cables
- Professional quality
Shimano Stainless Steel Shift Cable
Basic Shimano shift cables work with any mechanical derailleur and cost very little. Keep one or two in your repair kit as emergency spares. The standard 1.2mm diameter fits all modern shift systems, and the universal head design works with most shifters. Installation on trail requires minimal tools—just a way to cut cable and tension adjustment. These are the cables that have saved countless trips when primary cables failed unexpectedly.
- Universal compatibility
- Inexpensive enough to stock
- Standard 1.2mm diameter
- Stainless steel construction
- Essential repair kit item
Shimano Stainless Steel Brake Cable
Like the shift cable above, Shimano's basic brake cables provide reliable backup at minimal cost. The 1.6mm diameter handles braking loads, and the universal barrel head fits most brake levers. Brake cable failure is less common than shift cable failure, but when it happens, the consequences are more serious. Carry one as insurance—it weighs almost nothing and fits in any repair kit.
- Universal barrel head
- 1.6mm for brake loads
- Stainless steel
- Lightweight backup
- Fits most brake levers
Park Tool CN-10 Cable Cutter
Proper cable work requires proper cutters. The CN-10 makes clean cuts through both cable and housing without crushing or fraying. The compound leverage design provides enough force to cut shift and brake housing cleanly. The built-in crimper handles end caps and ferrules. If you're doing your own cable work—at home or on extended trips—this tool is essential. Cheap side cutters work once; the CN-10 works correctly every time.
- Clean cuts without fraying
- Works on cable and housing
- Built-in crimper
- Professional quality
- Essential for cable work
Jagwire Cable End Crimps
Every cable end needs a crimp to prevent fraying. These Jagwire crimps are aluminum, fit standard cable sizes, and come in bulk packs. Keep extras in your repair kit—you'll use them eventually. Clean crimps look professional and protect cable ends from unraveling. A bag of 100 lasts most home mechanics years. Match the size to your cables: 1.2mm for shift, 1.6mm for brake.
- Bulk pack for value
- Aluminum construction
- Standard sizes
- Essential finishing hardware
- Stock up and forget
Shimano Cable Housing
If you need to replace housing sections, Shimano's standard housing works with any mechanical system. Available in shift (linear) and brake (coiled) versions—don't interchange them. Cutting housing requires proper tools and technique, but carrying a 12-inch section of each type provides emergency repair capability. Pre-cut with ferrules installed before your trip for easier trail repair.
- Standard compatibility
- Shift and brake versions
- Quality construction
- Available everywhere
- Carry pre-cut sections
Cable Maintenance
Extending Cable Life
Lubrication:
- Light oil on inner cables periodically
- Don't over-lubricate (attracts dirt)
- Focus on housing entry points
Protection:
- Use ferrules on all housing ends
- End caps on all cable ends
- Avoid tight bends in routing
Inspection:
- Check anchor points regularly
- Look for fraying at high-wear points
- Replace at first sign of problems
Storage
For bikes in storage:
- Shift to slack position (small cog, small ring)
- Release brake quick-release if equipped
- Reduces cable tension during storage
For spare cables:
- Keep straight—avoid tight coils
- Store in dry location
- Check before packing for trips
Troubleshooting
| Symptom | Possible Cause | Solution |
|---|---|---|
| Stiff shifting | Housing friction, cable fraying | Lubricate or replace |
| Spongy brake lever | Cable stretch, anchor slip | Retension or replace |
| Clicking at shifter | Frayed cable at nipple | Replace cable |
| Cable won't seat | Wrong nipple type | Check compatibility |
| Quick corrosion | Low-quality cable | Use stainless steel |
| Housing splits | Age, UV damage | Replace housing |
FAQ
How do I know if it's a cable problem or derailleur problem?
Disconnect the cable from the derailleur. Does the derailleur spring back properly? If yes, the problem is cable-related. If the derailleur is stiff or doesn't return, the problem is in the derailleur mechanism.
Can I use brake cable for shifting?
No. Brake cables are thicker (1.6mm vs 1.2mm) and won't fit through shift system. The nipple shapes also differ. Use the correct cable type.
My new cables stretch quickly. Is this normal?
New cables stretch slightly as they seat. Pre-stretched cables minimize this. Expect to adjust tension after the first few rides with new cables, then they should stabilize.
Can I lubricate cables to extend life?
Light lubrication helps, but contaminated housing eventually needs replacement. Lube delays but doesn't prevent wear. If lubing doesn't restore smooth feel, replace the system.
Are coated cables worth the extra cost?
PTFE-coated cables run smoother and resist corrosion better than bare stainless. For bikepacking in varied weather, the extra durability is worth the modest price increase.
What about hydraulic brakes?
Hydraulic systems don't use cables—they use fluid in sealed hoses. This guide applies to mechanical (cable-actuated) systems only.
Related Guides
- Complete Bikepacking Maintenance Guide - Full maintenance overview
- Derailleur Adjustment Guide - When cables are fine but shifting isn't
- Disc Brake Maintenance - Brake-specific care
- Multi-Tool Guide - Tools for cable work
Cables are cheap. The work they do is critical. Regular inspection, timely replacement, and carrying spares ensure that this simple component never ends your trip.
Check your cables. Carry backups. Ride with confidence.


