Bike Cleaning for Bikepacking: Trail and Home Methods
20+ years testing gear in Colorado backcountry
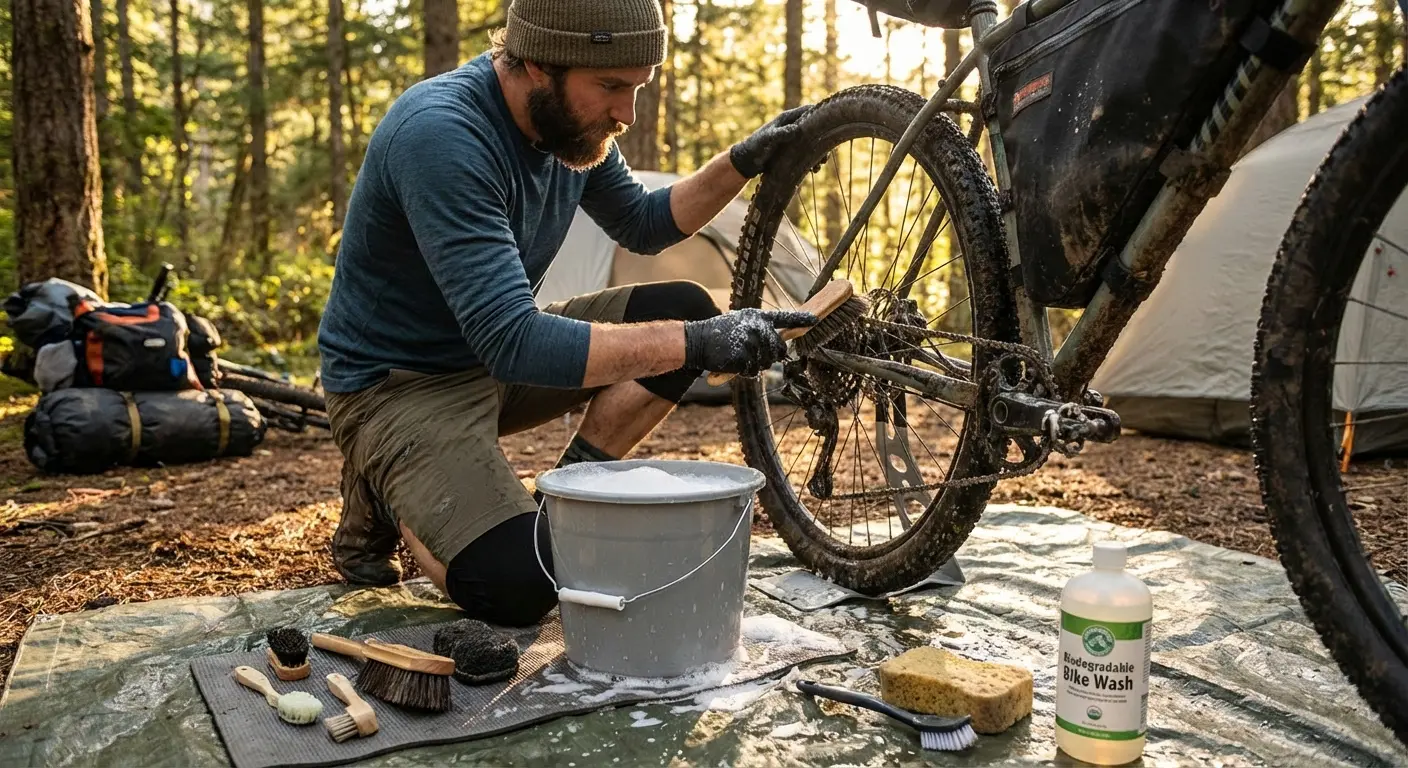
Clean Bikes Run Better
A clean bike isn't just aesthetically pleasing—it's functionally superior. Grit in your drivetrain is grinding paste. Dirt on your brakes reduces stopping power. Regular cleaning extends component life and improves performance.
On bikepacking trips, your bike encounters dust, mud, sand, and water. This debris infiltrates bearings, coats drivetrain components, and compromises brake performance. A little cleaning attention—on trail and at home—keeps everything working smoothly.
This guide covers practical cleaning methods for bikepacking contexts: quick trail cleaning when water is limited, thorough post-trip cleaning at home, and crucial knowledge about what products to avoid.
For complete maintenance guidance, see our Complete Bikepacking Maintenance Guide.
Trail Cleaning: When Water Is Limited
On multi-day trips, full washes aren't possible. These methods keep things functional with minimal resources.
The Daily Wipe-Down
Takes 5 minutes at camp:
- Chain wipe - Hold rag around chain, backpedal several rotations
- Cassette brush - Clear debris between cogs with small brush
- Brake rotor wipe - Clean cloth only, no oils
- Frame wipe - Remove mud from pivots and bearing areas
What you need:
- Clean rag (microfiber ideal)
- Small brush (old toothbrush works)
- No water required
Dealing with Mud
Mud is worse than dust—it cakes, dries, and creates grinding surfaces.
Fresh mud:
- Remove while still wet—much easier
- Use stick or fingers for big clumps
- Wipe with wet rag if water available
- Focus on drivetrain and brake areas first
Dried mud:
- Harder to remove without water
- Use brush to loosen, then wipe
- Don't scrape with hard objects (damages paint)
- Address high-priority areas (chain, brakes) first
Stream or Lake Cleaning
When you have natural water access:
Safe approach:
- Remove large debris by hand first
- Pour or splash water on frame and wheels
- Avoid directing water at bearings or seals
- Use brush to agitate stuck dirt
- Wipe dry, especially around bearing areas
- Relube chain after any water contact
Leave no trace:
- Don't use soap in natural water sources
- Move away from water's edge for bike work
- Dispose of greasy rags properly
Drivetrain Priority
The drivetrain suffers most from dirt. Even without a full wash:
- Wipe chain thoroughly - Get interior plates as clean as possible
- Clean cassette - Brush between cogs
- Clean chainring - Remove packed debris
- Clean derailleur pulleys - Often neglected, collect significant grit
- Relube chain - After any cleaning, apply fresh lube
A relatively clean, well-lubed chain on a dirty bike runs better than a clean bike with a gritty chain.
Post-Trip Deep Cleaning
At home, do it right.
Setup
What you need:
- Bucket with bike wash solution
- Separate bucket with clean water
- Brushes (various sizes)
- Sponge for frame
- Degreaser for drivetrain
- Hose or large water container
- Clean rags for drying
- Chain lube
Work area:
- Somewhere water runoff is acceptable
- Avoid drains where grease enters sewer
- Grass area collects debris for easy cleanup
The Cleaning Order
1. Wheels and tires first
- Remove wheels for easier access
- Brush tires to remove embedded debris
- Clean rims/spokes with soapy water
- Rinse and set aside to dry
2. Drivetrain degreasing
- Apply degreaser to chain, cassette, chainrings
- Let sit 5-10 minutes
- Scrub with brush
- Rinse thoroughly with water
3. Frame and fork
- Apply bike wash solution with sponge
- Work top-down (cleanest areas first)
- Use brush for textured areas
- Avoid high-pressure near bearings
4. Brakes
- Clean rotors with dedicated brake cleaner
- Clean calipers exterior with bike wash
- Never spray lubricants or degreasers near brake components
5. Components
- Clean pedals, saddle, handlebars
- Wipe down cables and housing
- Clean any accessories
6. Rinse
- Low-pressure rinse entire bike
- Focus on removing all soap residue
- Avoid directing water at bearing seals
7. Dry
- Wipe frame with clean dry cloth
- Bounce bike to shake water from crevices
- Use compressed air if available (low pressure)
- Let air dry in sun or breeze
8. Re-lubricate
- Chain (required after any wet cleaning) — see chain lubrication guide
- Pivot points
- Cable entry points (light spray)
Deep Drivetrain Cleaning
For seriously dirty drivetrains:
Chain cleaning device:
- Fill reservoir with degreaser
- Clip around chain
- Backpedal 50+ rotations
- Empty and refill with clean degreaser
- Repeat until solvent comes out clear
Remove and soak:
- Remove chain using quick link
- Soak in degreaser container 15-20 minutes
- Agitate periodically
- Scrub stubborn deposits
- Rinse with clean water
- Dry completely before relubing
See our Chain Maintenance Guide for complete chain care.
What NOT to Use
Some common cleaning products damage bike components.
High-Pressure Water
Problems:
- Strips grease from bearings
- Forces water into sealed components
- Can damage decals and finish
- May push contamination deeper
Instead:
- Low-pressure hose or bucket pour
- Brush agitation for stubborn dirt
- Patience over pressure
Harsh Degreasers Near Brakes
Never apply:
- Chain degreaser on or near brake rotors
- Lubricants anywhere near brakes
- General cleaning spray with oil content
Why it matters:
- Brake pads absorb oil and become contaminated
- Contaminated pads rarely clean effectively
- Results in dangerous braking reduction
Safe practice:
- Cover brakes when using degreaser
- Use brake-specific cleaner on rotors
- Clean hands before touching brake components
Citrus or Harsh Solvents on Some Materials
Be careful with:
- Citrus-based cleaners on certain seals
- Aggressive solvents on painted surfaces
- Any cleaner on carbon without checking compatibility
Safe choices:
- Bike-specific cleaners
- Mild dish soap diluted in water
- Dedicated brake cleaner for rotors
WD-40 as Chain Lube
WD-40 is:
- A water displacer and light solvent
- NOT a chain lubricant
Using it on chain:
- Removes existing lubrication
- Provides minimal protection
- Attracts dirt
Instead:
- Clean with degreaser
- Apply proper chain lube
- Use WD-40 only to displace water before proper lubing
Featured Products
Muc-Off Nano Tech Bike Cleaner
Nano Technology bike wash breaks down dirt and grime without harsh chemicals. Safe for all finishes including carbon and anodized aluminum. The pink color makes it easy to see coverage, and the formula rinses clean without residue. Spray on, let work for a minute, brush stubborn areas, rinse off. Biodegradable formula is better for the environment than many competitors. We keep a bottle ready for every post-trip clean.
- Safe for all bike surfaces
- Nano technology breaks down grime
- Biodegradable formula
- Easy to see coverage
- Rinses clean
Finish Line EcoTech Degreaser
Plant-based degreaser that actually works. EcoTech dissolves chain grime, cassette buildup, and chainring deposits without harsh chemicals. The soy-based formula is biodegradable and safer for garage use than petroleum degreasers. Spray or brush on, let penetrate, scrub, rinse. Safe for all bike components except brake surfaces. The 20 oz bottle lasts through many deep cleaning sessions.
- Plant-based formula
- Actually dissolves grime
- Biodegradable
- Safer than petroleum
- Large 20 oz bottle
Park Tool CM-5.3 Chain Scrubber
The fastest way to deep clean a chain without removing it. Fill the reservoir with degreaser, clip around the chain, and backpedal. Rotating brushes scrub all four chain surfaces simultaneously. Empty, refill, repeat until the solvent comes out clean. Ten minutes to a chain that looks nearly new. We use this before every major trip and monthly during heavy riding. Works with any liquid degreaser.
- Cleans all chain surfaces
- No chain removal needed
- Rotating brush design
- Works with any degreaser
- 10-minute deep clean
Muc-Off Disc Brake Cleaner
Purpose-made for disc brakes, this cleaner removes contamination from rotors and pads without leaving residue that affects braking. Use after any chain lubrication session or whenever brakes feel contaminated. Spray on, wipe clean. Safe for all brake components including seals. Much better than using isopropyl alcohol alone, and purpose-formulated to avoid the problems other cleaners cause.
- Won't contaminate pads
- No residue left behind
- Safe for seals
- Quick drying
- Purpose-formulated for brakes
Finish Line Brush Set
Five brushes covering all bike cleaning needs: stiff bristles for tires and mud, soft for frames, narrow for cassette gaps, curved for derailleur pulleys, and general purpose. Having the right brush makes cleaning faster and more effective. These won't win durability awards, but they work well and the variety is useful. Replace annually or when bristles flatten.
- Five brush variety
- Different bristle stiffness
- Cassette-specific brush
- Affordable set
- Covers all cleaning needs
Microfiber Cleaning Cloths
Microfiber cloths clean better than cotton rags—they absorb water, pick up dirt, and don't leave lint behind. Use damp for washing, dry for polishing. Machine washable hundreds of times. Keep a stack in your garage and pack one for trail cleaning. These generic auto-detailing cloths work perfectly for bikes at a fraction of bike-branded prices.
- Absorb water efficiently
- Don't leave lint
- Machine washable
- Multi-pack value
- Work better than cotton
Cleaning Schedule
| When | What | Time |
|---|---|---|
| Every camp | Chain wipe, cassette brush | 5 min |
| After muddy days | Quick rinse and wipe if water available | 10-15 min |
| End of every trip | Full deep clean at home | 30-45 min |
| Monthly (regular riding) | Deep drivetrain clean | 20 min |
| Before storage | Complete clean and lube | 45 min |
FAQ
How often should I fully wash my bike?
After every multi-day trip. During regular use, monthly is usually sufficient unless you ride in mud, rain, or sandy conditions frequently. The drivetrain needs attention more often than the frame.
Can I use dish soap?
Mild dish soap diluted in water works fine for frame cleaning. Avoid on drivetrain (doesn't cut grease well) and keep away from brakes. Bike-specific wash is better but dish soap in a pinch is acceptable.
Do I really need to dry my bike?
Yes—water left in crevices causes corrosion, especially in bearing areas. Wipe dry, bounce to shake out trapped water, and let air dry before storage.
Is it okay to ride a wet bike?
Yes, but relube the chain after riding in wet conditions and don't store the bike wet. Water in itself isn't harmful to most components; standing water and trapped moisture cause problems.
Should I clean before or after a trip?
Both. Clean before to ensure everything's working well. Clean after to remove trip grime and prevent corrosion during storage.
Can cleaning damage bearings?
Yes—high-pressure water or submerging bearing areas forces water past seals. Clean around bearings carefully with low-pressure water and dry thoroughly.
Related Guides
- Complete Bikepacking Maintenance Guide - Full maintenance overview
- Chain Maintenance Guide - Detailed chain care
- Disc Brake Maintenance - Brake cleaning specifics
- Pre-Trip Inspection Checklist - Preparation checklist
A clean bike is a happy bike. Regular cleaning prevents problems, extends component life, and keeps everything working smoothly. It doesn't have to be complicated—consistent basic cleaning beats occasional intensive efforts.
Clean drivetrain, clear brakes, dry bearings.
Ride clean, ride long.


