Bikepacking Chain Maintenance: Cleaning, Lubing, and Trail Repair
20+ years testing gear in Colorado backcountry
Your Chain Is Your Most Critical Connection
A neglected chain doesn't just make noise—it systematically destroys your cassette and chainrings, turning a $30 problem into a $200 one.
Everything you do on a bike flows through your chain. Every pedal stroke, every climb, every mile. It's the most stressed component on your bike, and on bikepacking trips—loaded with gear, grinding through grit and water—that stress multiplies.
The good news: chain maintenance is simple once you understand the basics. Twenty minutes of attention before a trip and a few minutes each day on trail keeps your drivetrain running smoothly for thousands of miles.
This guide covers everything you need to maintain your chain at home and repair it on trail. For the complete maintenance picture, see our Complete Bikepacking Maintenance Guide.
Understanding Chain Wear
Chains don't "stretch"—they elongate as pins and rollers wear against each other. This elongation is measured as a percentage of the original length.
Why Wear Matters
The cost of neglect:
- Chain replacement: $20-50
- Cassette replacement: $50-150
- Chainring replacement: $30-100+
- Total drivetrain: $100-300+
Replacing your chain at the right time saves your cassette and chainrings for multiple chain lifetimes.
How to Measure Chain Wear
Chain checker tools (recommended):
- Insert the hook end into a chain roller
- Drop the other end toward the chain
- Read the indicator at 0.5% and 0.75% marks
- If it drops in at 0.5%, replace the chain
- If it drops in at 0.75%, replace chain and probably cassette
Ruler method (backup):
- Count 24 full links (pin to pin, each full link is 1 inch)
- Measure pin center to pin center
- A new chain measures exactly 12 inches (24 x 0.5")
- At 12 1/16" (0.5% wear), replace chain
- At 12 1/8" (1% wear), replace everything
When to Check
| Condition | Check Interval |
|---|---|
| Road riding, clean conditions | Every 1000 miles |
| Gravel/dry dust | Every 500 miles |
| Wet/muddy conditions | Every 250-300 miles |
| Before multi-day trips | Always |
Chain Cleaning Methods
A clean chain runs quieter, shifts better, and lasts longer. How you clean depends on available resources.
Quick Trail Cleaning
When you're out for days without access to a hose:
- Wipe down with rag - Hold chain in rag, backpedal through several rotations
- Brush between plates - Small brush or old toothbrush removes packed grit
- Inspect for damage - Look for stiff links, damaged rollers
- Relube - Apply fresh lube to clean surface
- Wipe excess - Remove outer lube that attracts dirt
Trail cleaning frequency: Every 1-3 days depending on conditions
Deep Cleaning (At Home)
Before every multi-day trip:
Method 1: Chain cleaning device
- Fill device reservoir with degreaser
- Clip around chain
- Backpedal 50+ rotations
- Empty dirty degreaser, refill with clean
- Repeat until clean
- Rinse with water
- Dry thoroughly before lubing
Method 2: Remove and soak
- Open quick link with pliers
- Remove chain completely
- Soak in degreaser container for 10-15 minutes
- Shake or agitate periodically
- Scrub stubborn deposits with brush
- Rinse thoroughly
- Dry completely (air dry or use cloth)
- Reinstall and lube
What NOT to Use
- WD-40 alone - It's a solvent/water displacer, not a lubricant
- Gasoline or harsh solvents - Damage rollers and bushings
- High-pressure water - Forces water into rollers where it causes corrosion
- Dish soap - Leaves residue that attracts dirt
Choosing and Applying Chain Lube
Lube choice depends primarily on conditions. Both wet and dry lubes work; the question is which works better for your environment.
Wet Lube
Best for:
- Rain, stream crossings, morning dew
- Mud and wet grit
- Extended trips where reapplication isn't possible
Characteristics:
- Stays liquid, doesn't wash off easily
- Attracts more dirt and grit
- Lasts longer between applications
- Requires more thorough cleaning
Dry Lube
Best for:
- Dry, dusty conditions
- Summer riding
- Areas with fine sand or desert dust
Characteristics:
- Dries to waxy film
- Attracts less dirt
- Needs more frequent application
- Washes off in water
Wax-Based Lubes
Best for:
- Riders who prioritize clean drivetrains
- Dry conditions
- Those willing to do more frequent maintenance
Characteristics:
- Extremely clean running
- Excellent for dry conditions
- Requires specific application method (some need hot dip)
- Washes off readily in wet conditions
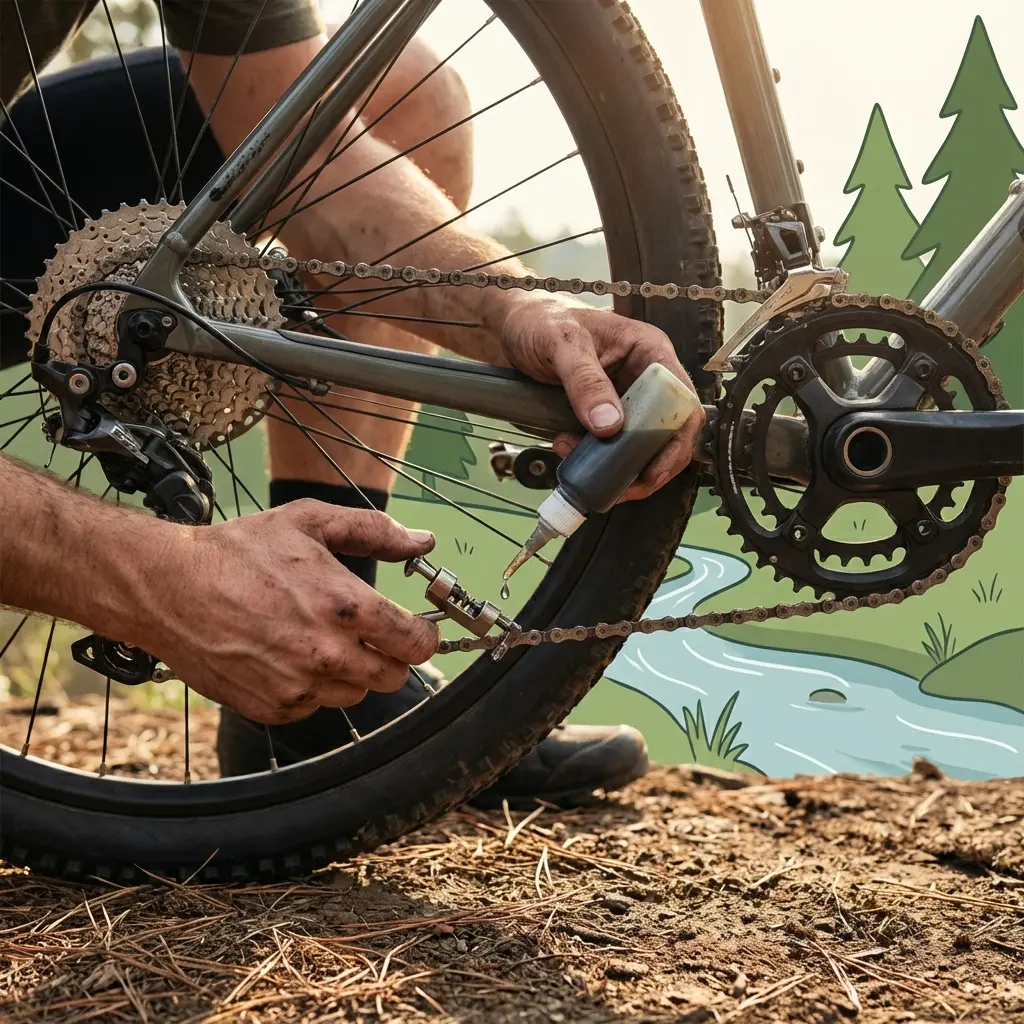
Application Technique
Proper application matters as much as lube choice:
- Start with clean chain - Lube over grit creates grinding paste
- Apply to inner plates - The inside of the chain, where rollers contact
- One drop per roller - Backpedal slowly while applying
- Let penetrate - Wait 5 minutes before wiping
- Wipe exterior thoroughly - Excess outer lube attracts grit
- Less is more - Thin layer inside beats thick layer everywhere
Replacing Your Chain
When your chain checker drops in at 0.5%, it's replacement time.
What You'll Need
- New chain (correct length and speed for your drivetrain)
- Chain tool
- Quick link for your chain speed
- Pliers (master link pliers preferred)
Sizing Your New Chain
Method 1: Match old chain
- Lay new chain next to old chain
- Count links to ensure same length
- This works only if old chain was correct length
Method 2: Wrap and measure
- Route new chain through big-big (largest chainring, largest cog)
- Skip the rear derailleur
- Pull ends together
- Add 2 full links to where they meet
- This length accommodates derailleur cage
Method 3: Manufacturer specs
- Some bikes specify exact link counts
- Check your bike's documentation
Breaking and Joining Chain
Using chain tool:
- Place chain in tool, align pin with roller
- Turn handle to push pin
- Push pin most of the way through—not completely out
- Leave pin barely flush with outer plate
- Reverse to rejoin, pressing pin back through
- Flex link side to side to free it up
Using quick link (preferred):
- Push pin completely out (removing outer plate)
- Thread quick link plates through chain ends
- Pull chain taut while backpedaling
- Click indicates link is seated
- Verify both plates are fully engaged
Trail Repair: Fixing a Broken Chain
A broken chain strands you. Knowing how to repair it gets you moving again.
What to Carry
- Multi-tool with chain tool
- 2+ quick links (matching your chain speed)
- Master link pliers (optional but helpful)
- Small rag
Repair Steps
-
Assess the damage
- Identify broken/bent pins and plates
- Determine how many links to remove
-
Remove damaged section
- Use chain tool to push out pins on either side of damage
- Remove the damaged links completely
- You'll lose 1-2 full links minimum
-
Rejoin with quick link
- Thread quick link plates through chain ends
- Pull tight while engaging pedal
- Click indicates secure connection
-
Verify repair
- Visually inspect—both quick link plates should be fully seated
- Flex the repaired link—should move freely
- Backpedal through full chain loop
- No tight or stiff spots
-
Test under load
- Start gently
- Gradually increase pedaling force
- Listen for clicks or unusual sounds
Dealing with a Shortened Chain
Removing links shortens your chain. Immediate implications:
Minor shortening (1-2 links):
- Avoid big-big gear combination
- Otherwise ride normally
- Replace chain at next opportunity
Significant shortening (3+ links):
- May not have full gear range
- Avoid cross-chaining
- Consider limiting yourself to 2/3 of cassette range
- Priority repair when possible
- If derailleur is also damaged, see singlespeed conversion
Featured Products
Park Tool CC-3.2 Chain Checker
The industry standard for measuring chain wear. Drop one end into the chain, read the indicator—if it falls to 0.5%, replace your chain before it damages your cassette. The CC-3.2 is stamped steel that lasts forever and weighs just 35 grams. We've carried the same one for years. Every bikepacker should own one; bring it on extended trips to monitor wear over thousands of miles. Worth many times its cost in saved drivetrain components.
- 0.5% and 0.75% wear indicators
- Simple drop-in operation
- Stamped steel lasts forever
- 35g—carry it with you
- Prevents expensive drivetrain damage
Finish Line Wet Bike Lubricant
When your route includes rain, stream crossings, or morning dew, Wet lube stays put while dry lubes wash away. The synthetic formula provides excellent protection for hundreds of miles even in foul conditions. Yes, it attracts more dirt than dry lubes—that's the trade-off for durability. Wipe excess after applying and clean more frequently. The 4oz bottle lasts most bikepackers an entire season. Our go-to for Pacific Northwest riding and any wet-weather adventure.
- Stays put in wet conditions
- Synthetic formula lasts 300+ miles
- Excellent corrosion protection
- 4oz bottle perfect for extended trips
- Industry-trusted formula
Finish Line Dry Teflon Lubricant
For dust, sand, and dry gravel—the conditions that describe most bikepacking—Dry lube runs cleaner while still protecting your chain. The Teflon formula dries to a waxy film that doesn't attract grit. Apply every few days instead of weekly, but your chain stays dramatically cleaner. Our default choice for desert riding, dry summer months, and any route where dust is the primary concern. The clean-running chain is worth the extra application frequency.
- Runs clean in dusty conditions
- Teflon formula repels dirt
- Dries to non-sticky film
- Reduces drivetrain wear
- 4oz bottle for season-long use
Park Tool CM-5.3 Cyclone Chain Scrubber
The fastest way to deep clean a chain without removing it. Fill the reservoir with degreaser, clip it around your chain, and backpedal. The rotating brushes scrub all four chain surfaces simultaneously. Empty and refill until the solvent comes out clean. In ten minutes, your chain looks new. We use this before every major trip and monthly during heavy-riding seasons. Pairs perfectly with a fresh lube application. Far more effective than rag-wiping alone.
- Cleans all chain surfaces simultaneously
- Rotating brush design
- Works without chain removal
- Quick 10-minute deep clean
- Reusable—just refill degreaser
SRAM PowerLock Chain Links (4-pack)
Every repair kit needs quick links. SRAM PowerLock links snap together by hand for fast chain repair without tools. The 4-pack ensures you have spares for multiple trips or multiple repairs. Available in 10, 11, and 12-speed—buy the version matching your drivetrain. We keep two in our trailside kit and two more in our home maintenance supplies. At a few dollars per link, there's no excuse not to have plenty. SRAM recommends single-use only—do not reuse for safety.
- Snap together without tools
- 4-pack provides backups
- Single-use per SRAM specs
- 10/11/12-speed options
- Essential repair kit item
Pedro's Pro Chain Keeper
When deep-cleaning your chain at home, the Chain Keeper holds your rear wheel's position while the chain is removed. This prevents derailleur damage and makes reinstallation easier. Just snap it into your rear dropout and route the chain through. Especially valuable for bikes with internally-routed cables where derailleur position matters. Not essential, but professional shops use them for good reason. Makes chain cleaning and replacement less fiddly.
- Holds derailleur position
- Easier chain reinstallation
- Prevents derailleur damage
- Works during cleaning
- Pro shop standard
Chain Maintenance Schedule
| When | Action |
|---|---|
| Every ride | Quick visual check for damage |
| Every 100-200 miles | Wipe down and relube |
| Every 500 miles | Check wear with chain checker |
| Every 1000 miles or deep clean | Full cleaning and fresh lube |
| At 0.5% wear | Replace chain |
| Before multi-day trips | Full clean, fresh lube, wear check |
FAQ
Can I use WD-40 on my chain?
WD-40 is a water displacer and light solvent, not a lubricant. You can use it to clean a chain, but you must apply proper chain lube afterward. Using WD-40 alone leaves your chain unprotected and accelerates wear.
How long should chain lube last?
Dry lubes typically need reapplication every 100-200 miles or after any water exposure. Wet lubes last longer—200-300 miles in dry conditions, but should be reapplied after significant water exposure. In wet conditions, check daily.
Should I remove my chain to clean it?
For deep cleaning, removing the chain allows the most thorough results. For routine maintenance, a chain cleaning device works well without removal. Both approaches work; choose based on how dirty the chain is and how much time you have.
What if my chain tool doesn't push the pin?
First, ensure the chain is properly seated in the tool's chain rest. Apply steady pressure—sudden force can slip. If a pin won't move, it may be a rivet-style link (some 11/12-speed chains use these). These require specific breaking points or should only be joined with quick links.
Can I reuse quick links?
It depends on the manufacturer. SRAM PowerLock links are designed for single use only—removal deforms the link and compromises the connection. Shimano quick links are also single-use. KMC Missing Links are generally reusable several times with careful handling. Always check manufacturer specifications and inspect for wear before reusing any link. When in doubt, use a fresh link—they're inexpensive insurance.
My chain is making noise after lubing. What's wrong?
Either too much lube (attracting grit) or too little (dry spots). Wipe thoroughly to remove excess, then ensure lube penetrated to the rollers. A thin interior layer beats a thick exterior coating. If noise persists, clean fully and relube properly.
Related Guides
- Complete Bikepacking Maintenance Guide - Full maintenance overview
- Multi-Tool Guide - Chain tools and more
- Derailleur Adjustment Guide - Shifting problems
- Building Your Tool Kit - What to carry
A well-maintained chain runs quiet, shifts smooth, and lasts thousands of miles. Neglect it, and you'll pay in worn components, frustrating shifting, and eventually a mid-trip failure.
The investment is minimal. The payoff is enormous. Keep your chain happy, and it'll carry you anywhere.


