Bearing Maintenance: Headset and Bottom Bracket Care for Bikepacking
20+ years testing gear in Colorado backcountry
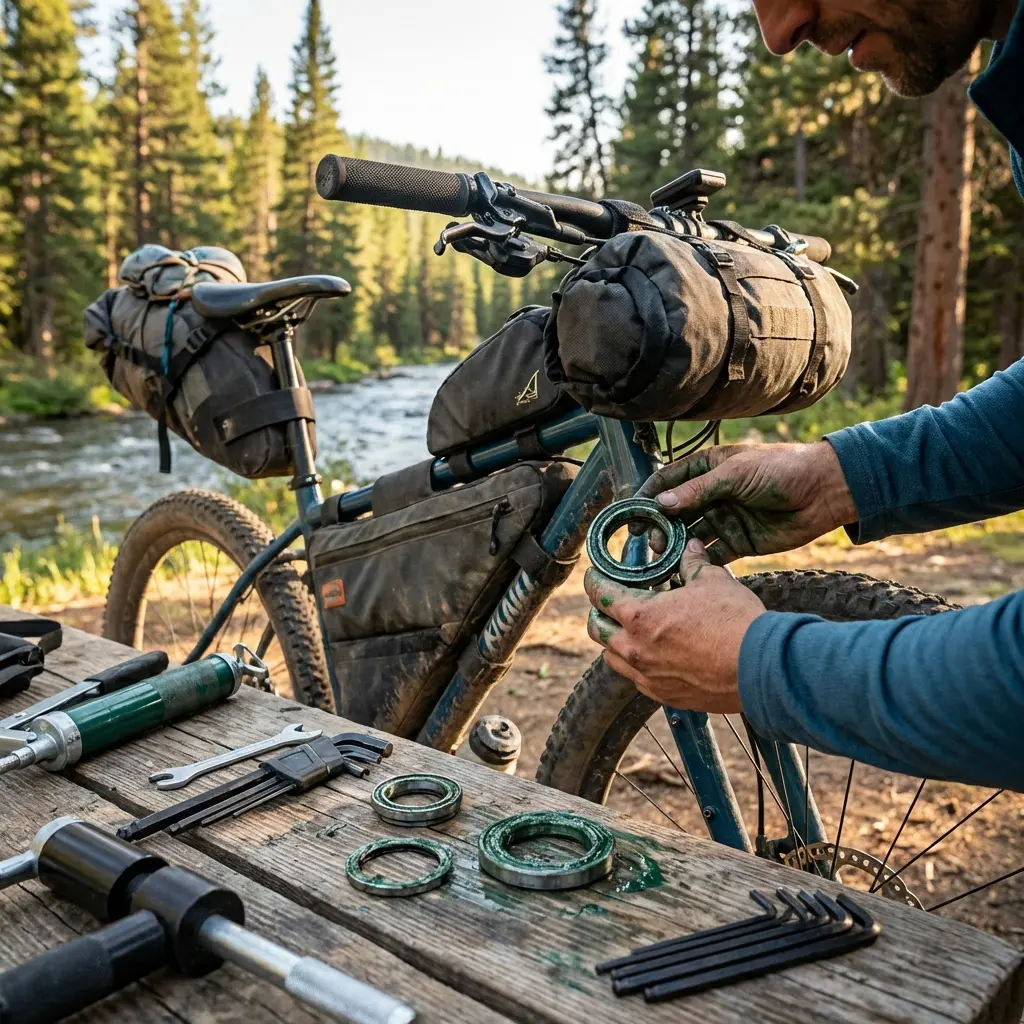
The Hidden Components
Your bike's bearings work silently underneath everything else. They spin freely when healthy, grind or click when worn, and fail dramatically when neglected. Catching problems early saves expensive replacements.
Inside your headset and bottom bracket, steel or ceramic balls roll smoothly in greased races. Every pedal stroke loads the bottom bracket. Every bump and steering input loads the headset. On loaded bikepacking bikes, these stresses multiply.
Bearing problems start subtly—a click, a slight roughness, a tiny bit of play. Caught early, they're usually adjustable. Ignored, they become expensive replacements and potential safety issues.
This guide covers bearing inspection, basic adjustment, and knowing when to seek professional help. For the complete maintenance picture, see our Complete Bikepacking Maintenance Guide.
Headset Basics
The headset connects your fork to your frame and allows steering. It's under constant load from road vibration, impacts, and handlebar-mounted bags.
Headset Types
Threaded headsets:
- Older standard
- Adjustable locknut system
- Less common on modern bikes
Threadless (Aheadset) headsets:
- Current standard
- Uses stem clamp and top cap for adjustment
- What you probably have
Integrated headsets:
- Bearings sit directly in frame cups
- Common on modern frames
- Similar adjustment to threadless
Checking for Headset Play
Play means looseness in the headset bearings.
The rock test:
- Stand beside your bike
- Apply front brake firmly
- Rock bike forward and backward
- Feel for clicking or movement at headset area
What you feel:
- No movement = properly adjusted
- Slight clicking = play present, adjustment needed
- Significant clunking = major looseness, immediate attention needed
Checking for Headset Roughness
Roughness indicates worn or contaminated bearings.
The turn test:
- Lift front wheel off ground
- Turn handlebars slowly through full range
- Feel for notchy spots or resistance
- Compare to smooth, free movement
What you feel:
- Smooth throughout = healthy bearings
- Notchy or indexed feeling = bearing damage
- Grinding sensation = contamination or severe wear
Adjusting a Threadless Headset
Most modern bikes use this system. Adjustment is straightforward.
What You'll Need
- Allen keys for stem bolts
- Allen key for top cap bolt
- Possibly headset spacers
Adjustment Procedure
- Loosen stem bolts - Don't remove, just loosen 1-2 turns
- Check top cap bolt - This is the adjustment bolt
- Tighten top cap bolt gradually - Quarter turns, checking for play between turns
- When play disappears, stop - Don't overtighten
- Realign stem - Straight with front wheel
- Tighten stem bolts - Alternating pattern, to torque spec (usually 4-6 Nm)
- Recheck for play - The adjustment may have shifted
Common Mistakes
Overtightening the top cap:
- Creates resistance when steering
- Damages bearings
- The top cap only removes play—it doesn't create clamping force
Loose stem bolts:
- Stem can twist under braking
- Dangerous at high speed or in rough terrain
Skipping the recheck:
- Tightening stem bolts can move the adjustment
- Always verify after final tightening
When Adjustment Doesn't Work
If play persists despite adjustment:
- Bearings may be worn past adjustment range
- Bearing races may be damaged
- Stack height may be incorrect (missing spacers)
- Bearings need service or replacement
Bottom Bracket Basics
The bottom bracket contains bearings that your crankset spins on. Every pedal stroke loads these bearings, especially under climbing power.
Bottom Bracket Types
Threaded external (BSA/English):
- Cups thread into frame
- External bearing cups
- Serviceable
Press-fit (BB30, PF30, BB86, etc.):
- Bearings press into frame directly
- Various standards
- Often requires special tools
Square taper and Octalink:
- Older standards
- Bearings inside frame
- Less common on modern bikes
Checking for Bottom Bracket Play
The lateral test:
- Remove chain from chainring (optional but clearer)
- Grab one crank arm
- Push and pull laterally (toward and away from frame)
- Feel for clicking or movement
What you feel:
- Solid, no movement = healthy
- Slight clicking = play present
- Significant wobble = worn bearings
Checking for Bottom Bracket Roughness
The spin test:
- Remove chain for clearest feel
- Spin cranks by hand
- Feel for grinding, clicking, or resistance
What you feel:
- Smooth, free spinning = healthy
- Grinding = contamination or wear
- Clicking at specific rotation points = damaged bearing
Trail Limitations
Bottom bracket work often requires specialized tools. On trail, your options are limited.
What You Can Check
- Identify the problem (play vs. roughness)
- Assess severity
- Note for shop attention
What You Usually Can't Do
- Adjust most press-fit BBs (requires special tools)
- Service sealed cartridge bearings (they're replaced, not rebuilt)
- Properly torque threaded BBs (requires BB tool and torque wrench)
Riding with BB Issues
Play present:
- Usually rideable but noisy
- May accelerate wear
- Get to shop when feasible
Grinding/roughness:
- More concerning
- Severe cases can seize
- Reduce power output on climbs
- Priority repair
Complete failure:
- Rare but possible
- Crank may fall out
- Not rideable—emergency situation
- See our Emergency Field Repairs Guide for improvisation options
When Bearings Need Service
Signs of Needed Service
| Sign | What It Means | Urgency |
|---|---|---|
| Clicking on every rotation | Play in bearings | Medium—adjust if possible |
| Grinding sensation | Contamination or wear | High—service soon |
| Visible rust or corrosion | Water intrusion | High—service before further damage |
| Notchy steering | Headset bearing damage | High—affects control |
| Play that can't be adjusted | Worn beyond tolerance | High—replacement likely |
Service Intervals
Headset:
- Check for play monthly
- Service every 1-2 years or after wet riding
- Replace when adjustment no longer eliminates play
Bottom Bracket:
- Check for play monthly
- Service interval varies by type and conditions
- Press-fit: often replaced rather than serviced
- Threaded: can be greased and reinstalled
DIY vs. Shop
DIY-appropriate:
- Headset adjustment
- Play diagnosis
- Cleaning external parts
- Greasing threaded BB cups (with proper tools)
Shop-recommended:
- Press-fit BB replacement
- Headset bearing replacement
- Race inspection
- Frame damage assessment
- Anything requiring specialty tools you don't have
Featured Products
Park Tool PPL-1 PolyLube 1000
The industry standard for bearing grease. PPL-1 is specifically designed for bicycle bearings—it resists water washout, maintains consistency across temperatures, and protects metal surfaces from corrosion. Use it when servicing headset and bottom bracket bearings, and for any threaded interface. The 4 oz tube lasts years for home mechanics. Every bike shop uses this or something comparable. Apply generously to bearings and races during assembly.
- Designed for bicycle bearings
- Resists water washout
- Temperature stable
- Corrosion protection
- Industry standard formula
Park Tool HCW-17 Headset Wrench
For bikes with traditional threaded headsets, the HCW-17 provides the leverage needed for proper locknut adjustment. The 32mm and 36mm flats cover most threaded headset sizes. If your bike has a threaded headset, this is an essential tool. Less common on modern bikes, but still found on touring frames and older designs. The long handle provides control without excessive force.
- 32mm and 36mm flats
- Long handle for control
- Works on threaded headsets
- Durable steel construction
- Essential for older bikes
Park Tool TWS-3 Torque Wrench Set
When tightening stem bolts and other critical fasteners, proper torque matters. The TWS-3 includes preset wrenches at 4, 5, and 6 Nm—the most common specs for handlebar and stem bolts. Click-style indicators confirm when you've reached the preset torque. Essential for carbon components where overtightening causes damage. For aluminum parts, proper torque prevents both stripping and insufficient clamping.
- 4, 5, and 6 Nm presets
- Click-style confirmation
- Essential for carbon parts
- Prevents overtightening
- Pocket-sized wrenches
FSA Headset Spacers
Headset spacers set your handlebar height and ensure proper preload. The FSA set includes 5mm, 10mm, and 15mm spacers in quality aluminum. If you're adjusting handlebar height or replacing a stem of different stack, proper spacers maintain correct headset function. Carrying a spare 5mm spacer adds negligible weight and can solve unexpected fit issues on extended trips.
- 5mm, 10mm, 15mm included
- Quality aluminum construction
- Standard 1-1/8 inch size
- Various colors available
- Lightweight and durable
Park Tool BBT-69 Bottom Bracket Tool
For threaded Shimano/SRAM external bottom brackets (Hollowtech II, GXP), the BBT-69 provides proper engagement for installation and removal. The 16-notch pattern matches these common systems. Essential for home mechanics servicing their own BBs. Combined with a long-handled wrench or breaker bar, it provides the torque needed for removal. Not a field-carry item, but necessary for proper maintenance at home.
- Fits Hollowtech II and GXP
- 16-notch pattern
- Works with breaker bar
- Steel construction
- Essential for BB service
Bearing Maintenance Schedule
| Interval | Headset | Bottom Bracket |
|---|---|---|
| Monthly | Check for play and roughness | Check for play and roughness |
| Every 6 months | Inspect and regrease if exposed | Inspect threads/cups |
| Annually | Full service, replace bearings if worn | Service or replace as needed |
| After wet rides | Check for water intrusion, dry if possible | Check for contamination |
| Before major trips | Full check, verify adjustment | Full check, note any issues |
FAQ
How long do headset bearings last?
With proper maintenance, 2-5 years is common. Sealed cartridge bearings in quality headsets last longer than loose ball bearings. Wet conditions and rough roads shorten lifespan.
Can I use automotive grease for bearings?
Some automotive greases work, but bicycle-specific grease is formulated for the specific demands of bike bearings—higher RPM, smaller bearings, water exposure. Use bike grease for reliability.
My headset clicks when going over bumps. What's wrong?
Usually indicates play in the headset bearings. Try the adjustment procedure above. If clicking persists, the bearings may be worn and need replacement.
Should I preload my headset or just eliminate play?
Eliminate play only. The top cap bolt removes slack—it shouldn't create bearing compression. Overtightening causes steering stiffness and accelerates wear.
My BB creaks. Is it worn out?
Not necessarily. Creaking often comes from the chainring/spider interface, pedal threads, or seatpost. Before replacing your BB, rule out other creak sources. If the BB has play or roughness, it's likely the culprit.
Do I need special tools for press-fit bottom brackets?
Yes. Press-fit installation and removal requires specific tools for your BB standard. Home mechanics can invest in these tools or have shops do press-fit work.
Related Guides
- Complete Bikepacking Maintenance Guide - Full maintenance overview
- Pre-Trip Inspection Checklist - What to check before rides
- Multi-Tool Guide - Essential tools
- Wheel Truing Guide - More wheel-related bearings
Bearings are the foundation of smooth operation. Check them regularly, catch problems early, and your headset and bottom bracket will spin freely for years.
Listen for clicks, feel for roughness, and address issues before they become failures.
Keep rolling smoothly.


